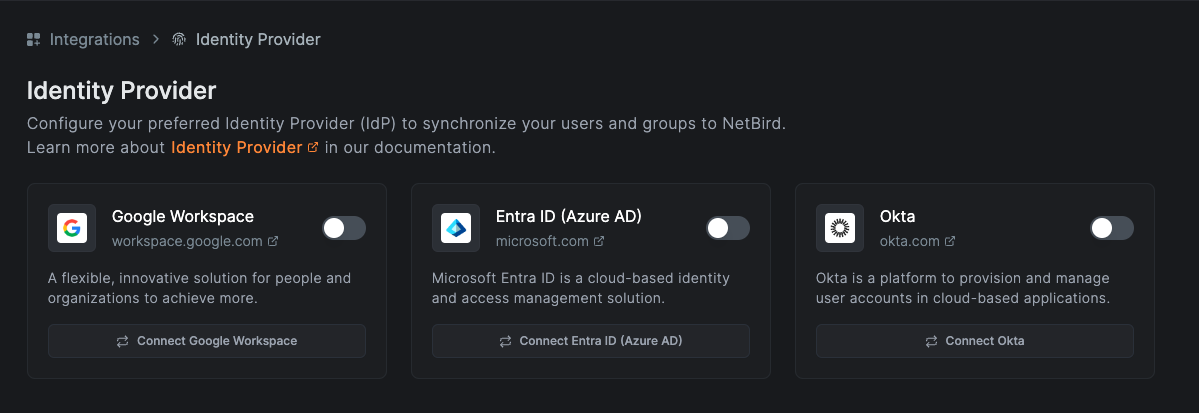
Identity Provider synchronization
Welcome to our comprehensive guide on configuring Identity Provider (IdP) for users and groups synchronization. This document provides step-by-step instructions and best practices for setting up and managing your synchronization processes effectively.
This feature is only available in the cloud version of Netzilo.
Google WorkSpace
Before you start creating and configuring an Google Workspace application, ensure that you have the following:
- User account with admin permissions: You must have an Google Workspace user account with the admin permissions to create and manage Google Workspace applications. If you don't have the required permissions, ask your workspace administrator to grant them to you.
- Create new
Netziloproject in Google cloud console https://console.cloud.google.com. - Enable
Admin SDK APIfornetziloproject at https://console.cloud.google.com/apis/library/admin.googleapis.com.
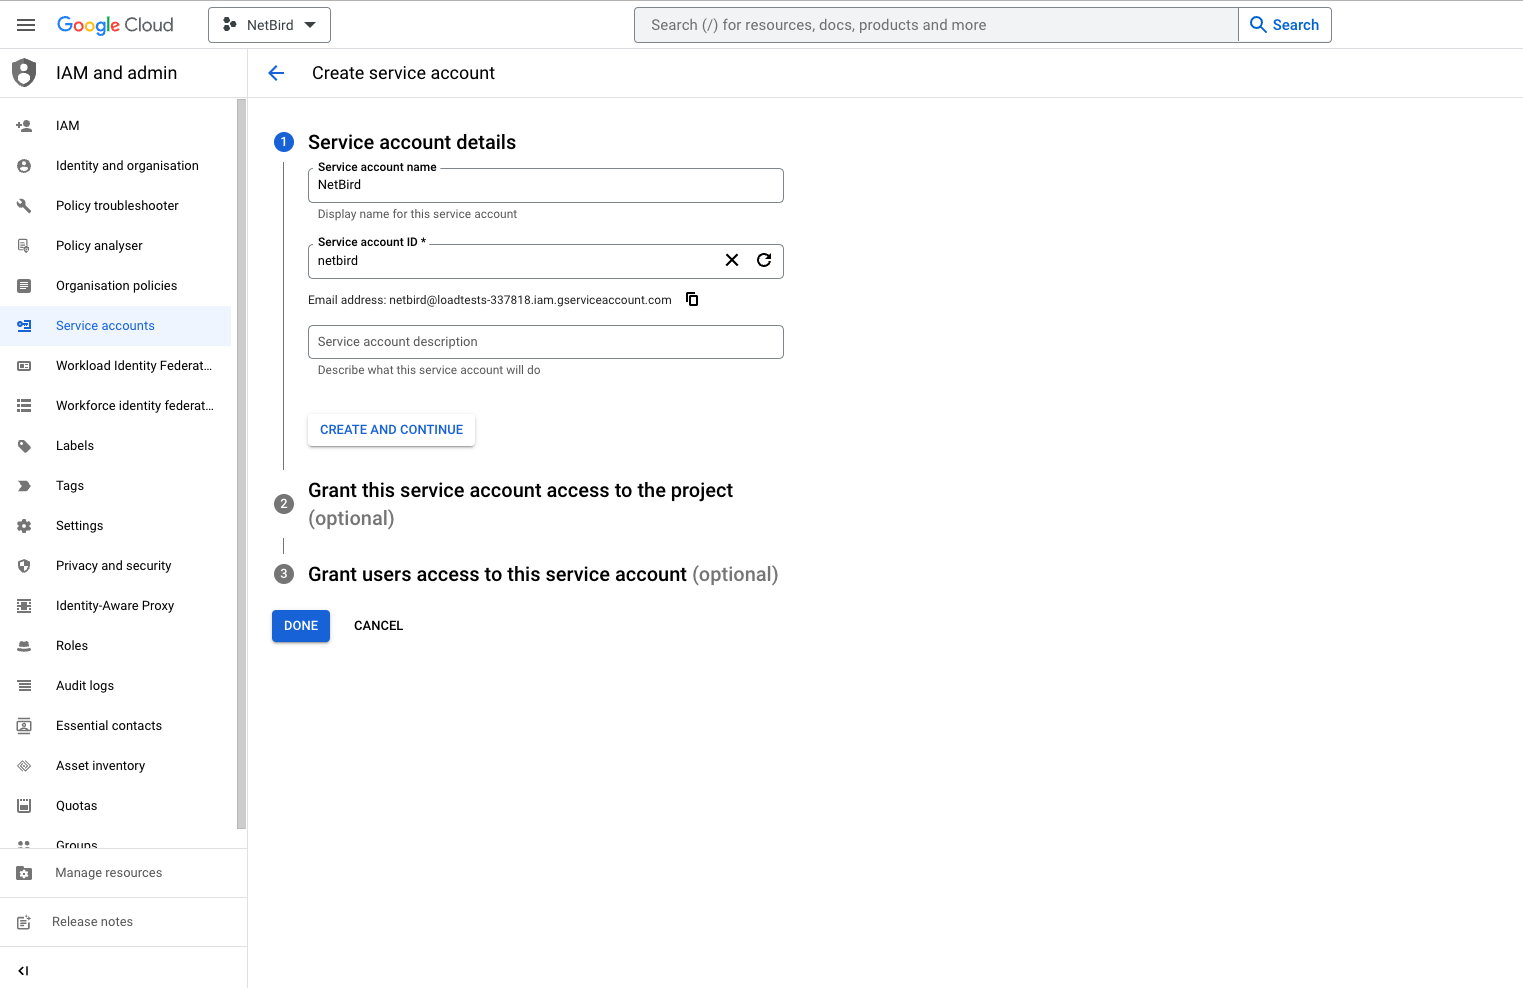
Step 1: Create a service account
- Navigate to API Credentials page
- Click
CREATE CREDENTIALSat the top and selectService account - Fill in the form with the following values and click
CREATE- Service account name:
Netzilo - Service account ID:
netzilo
- Service account name:
- Click
DONE
Step 2: Create service account keys
- Navigate to API Credentials page
- Under
Service Accountsclick theNetziloto edit the service account
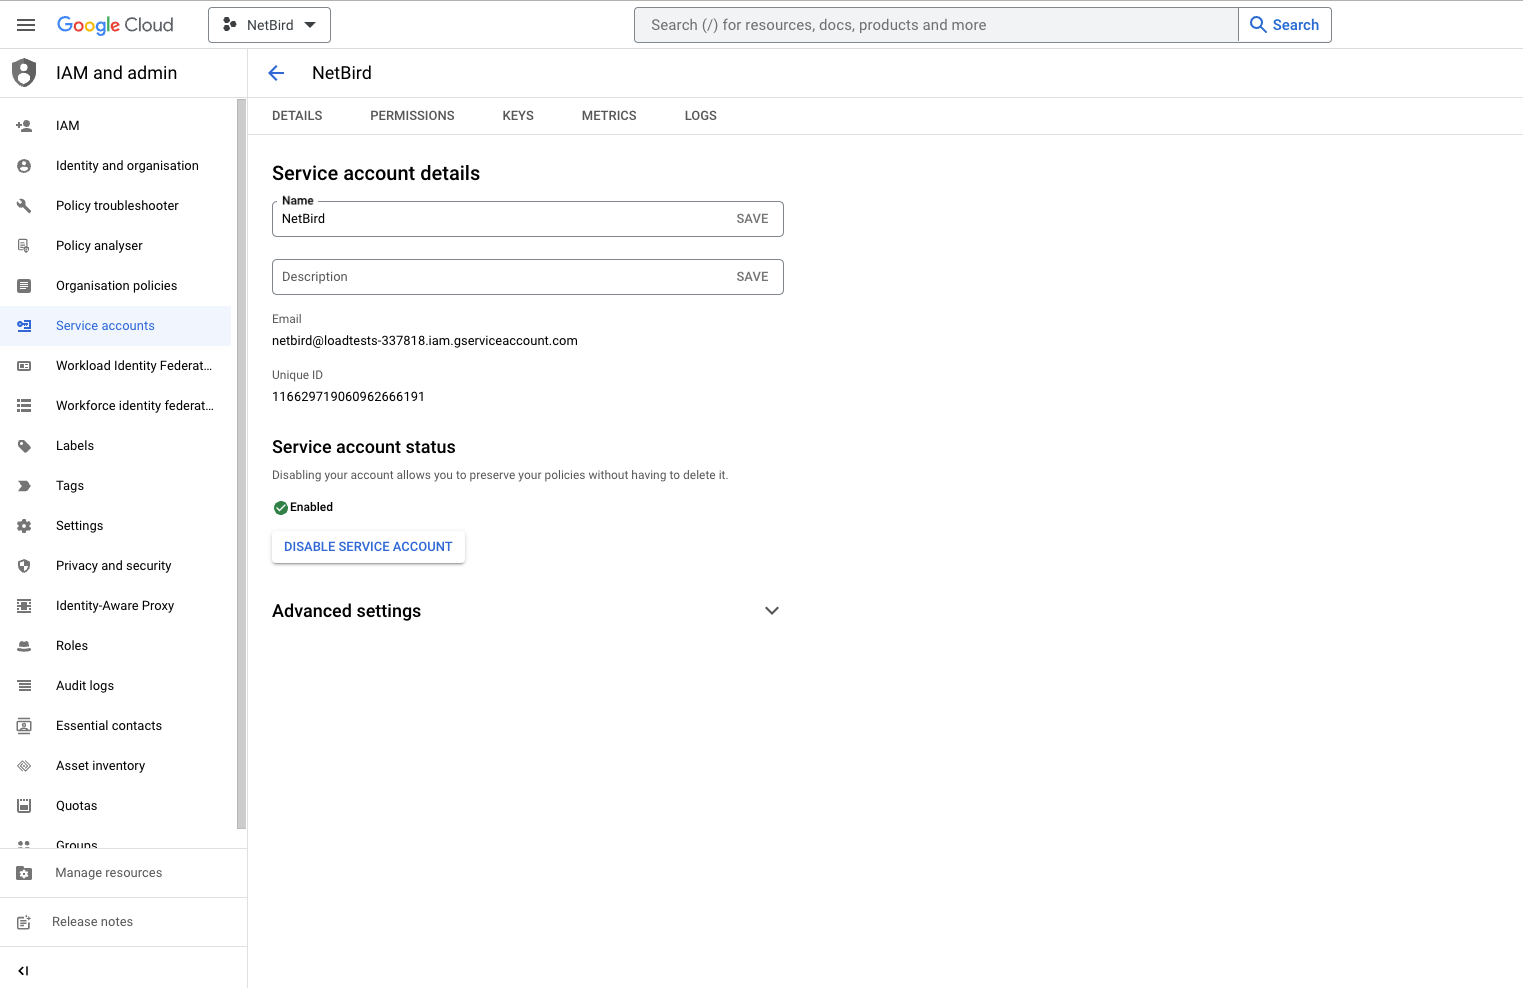
- Take note of service account email address, you will use it in next steps
- Click the
Keystab - Click the
Add keydrop-down menu, then selectCreate new key - Select
JSONas the Key type and clickCreate
When you create a service account key by using the Google Cloud console, most browsers immediately download the new key and save it in a download folder on your computer. Read how to manage and secure your service keys here
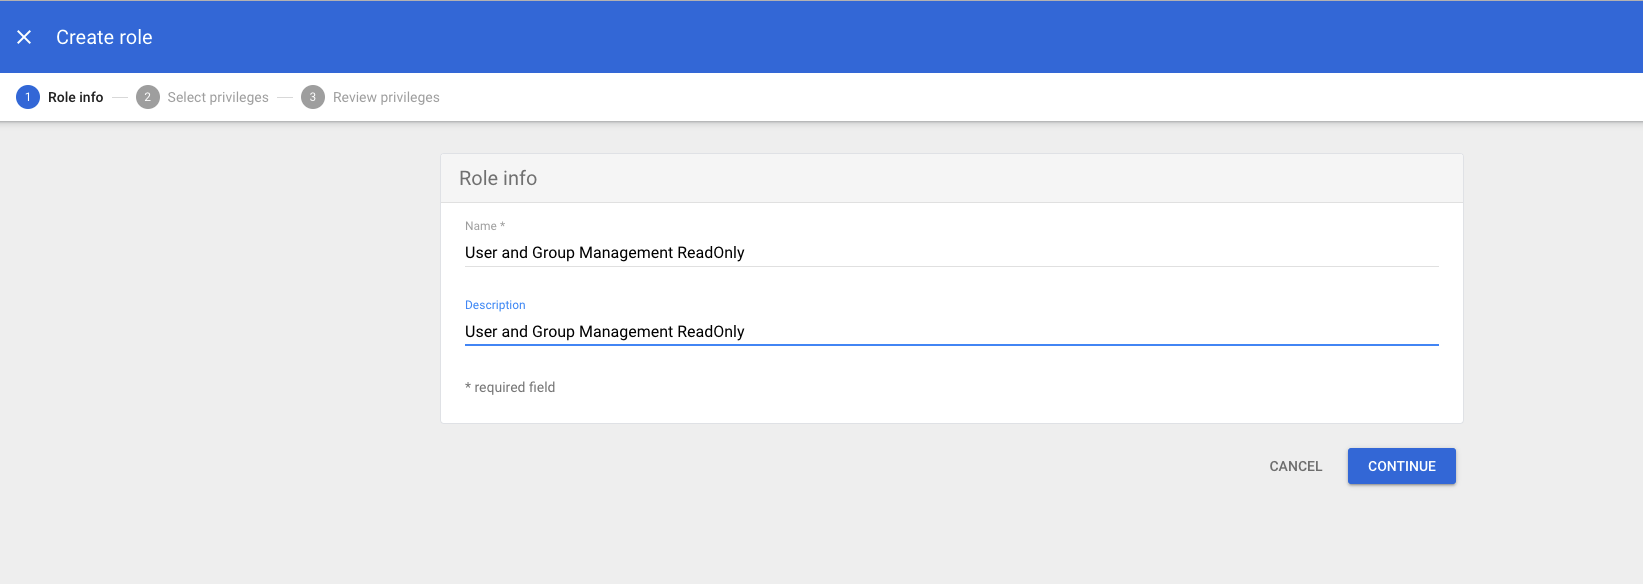
Step 3: Grant a user management admin role to a service account
- Navigate to Admin Console page
- Select
Accounton the left menu and then clickAdmin Roles - Click
Create new role - Fill in the form with the following values and click
CREATE- name:
User and Group Management ReadOnly - description:
User and Group Management ReadOnly
- name:
- Click
CONTINUE
- Scroll down to
Admin API privilegesand add the following privileges- Users:
Read - Groups:
Read
- Users:
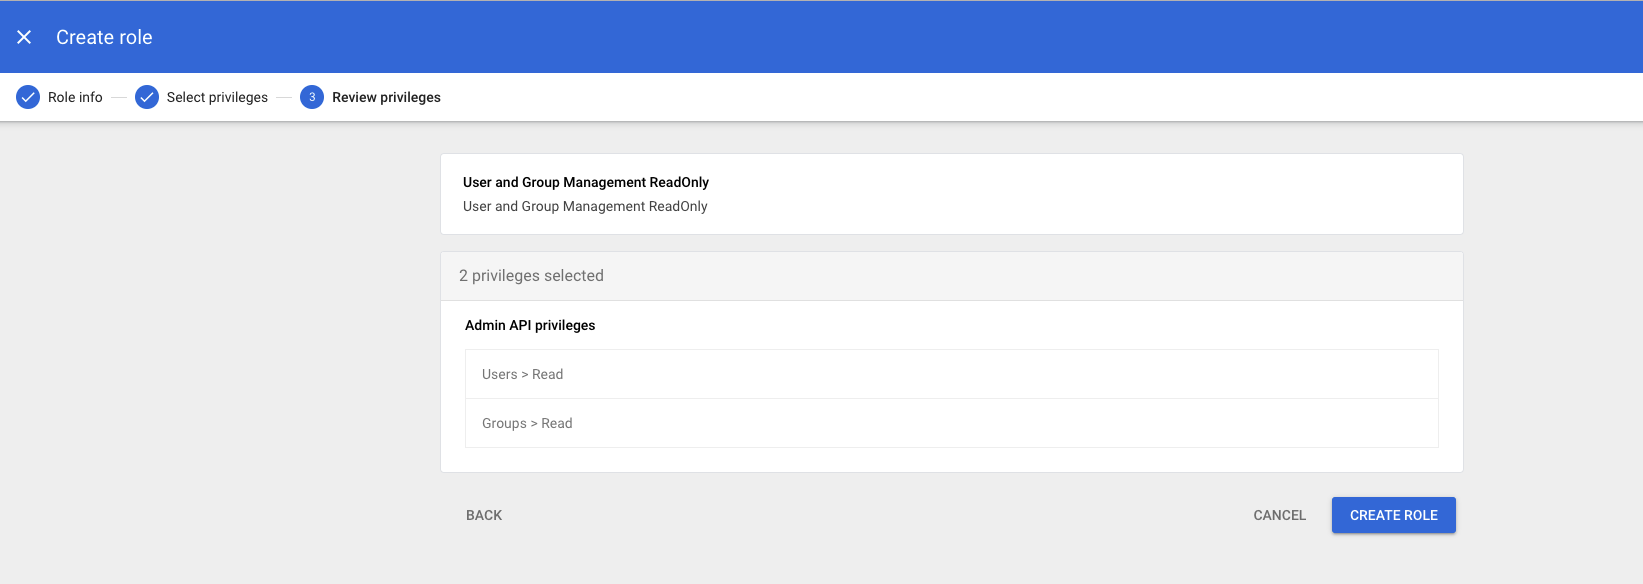
-
Verify preview of assigned Admin API privileges to ensure that everything is properly configured, and then click
CREATE ROLE -
Click
Assign service accounts, add service account email address and then clickADD
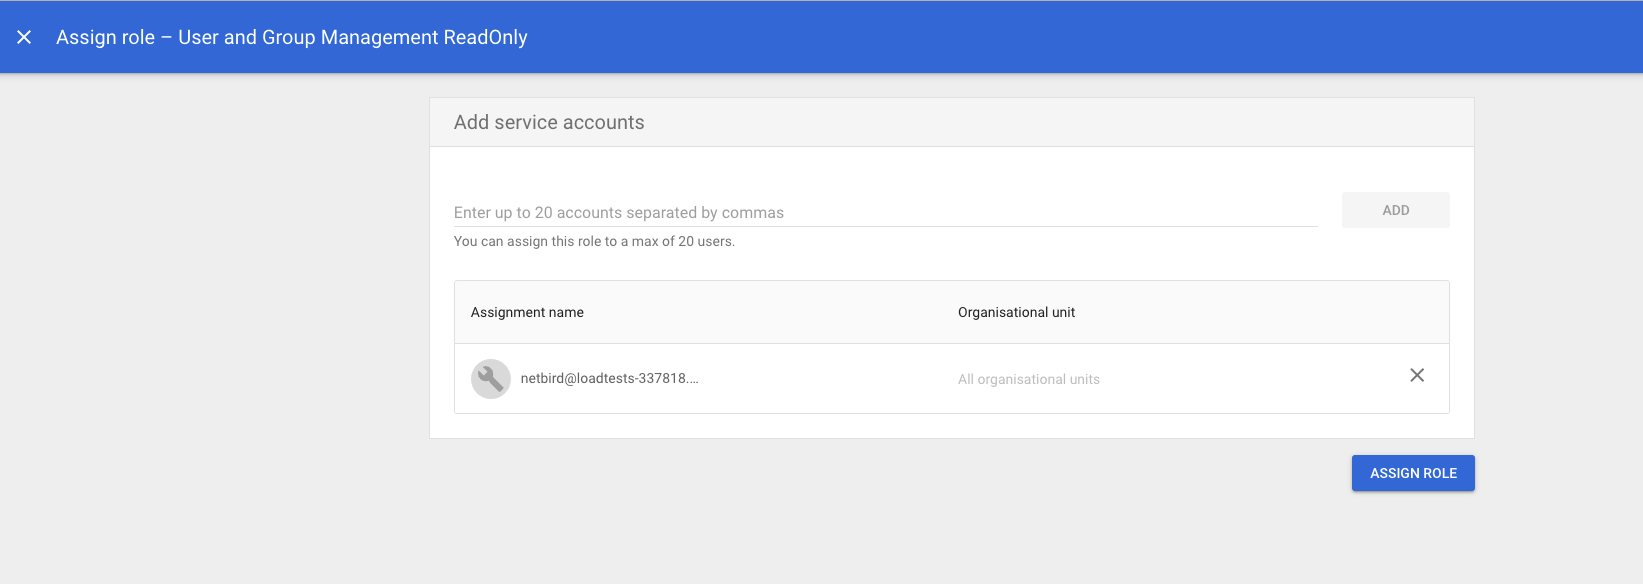
- Click
ASSIGN ROLEto assign service account toUser and Group Management ReadOnlyadmin role
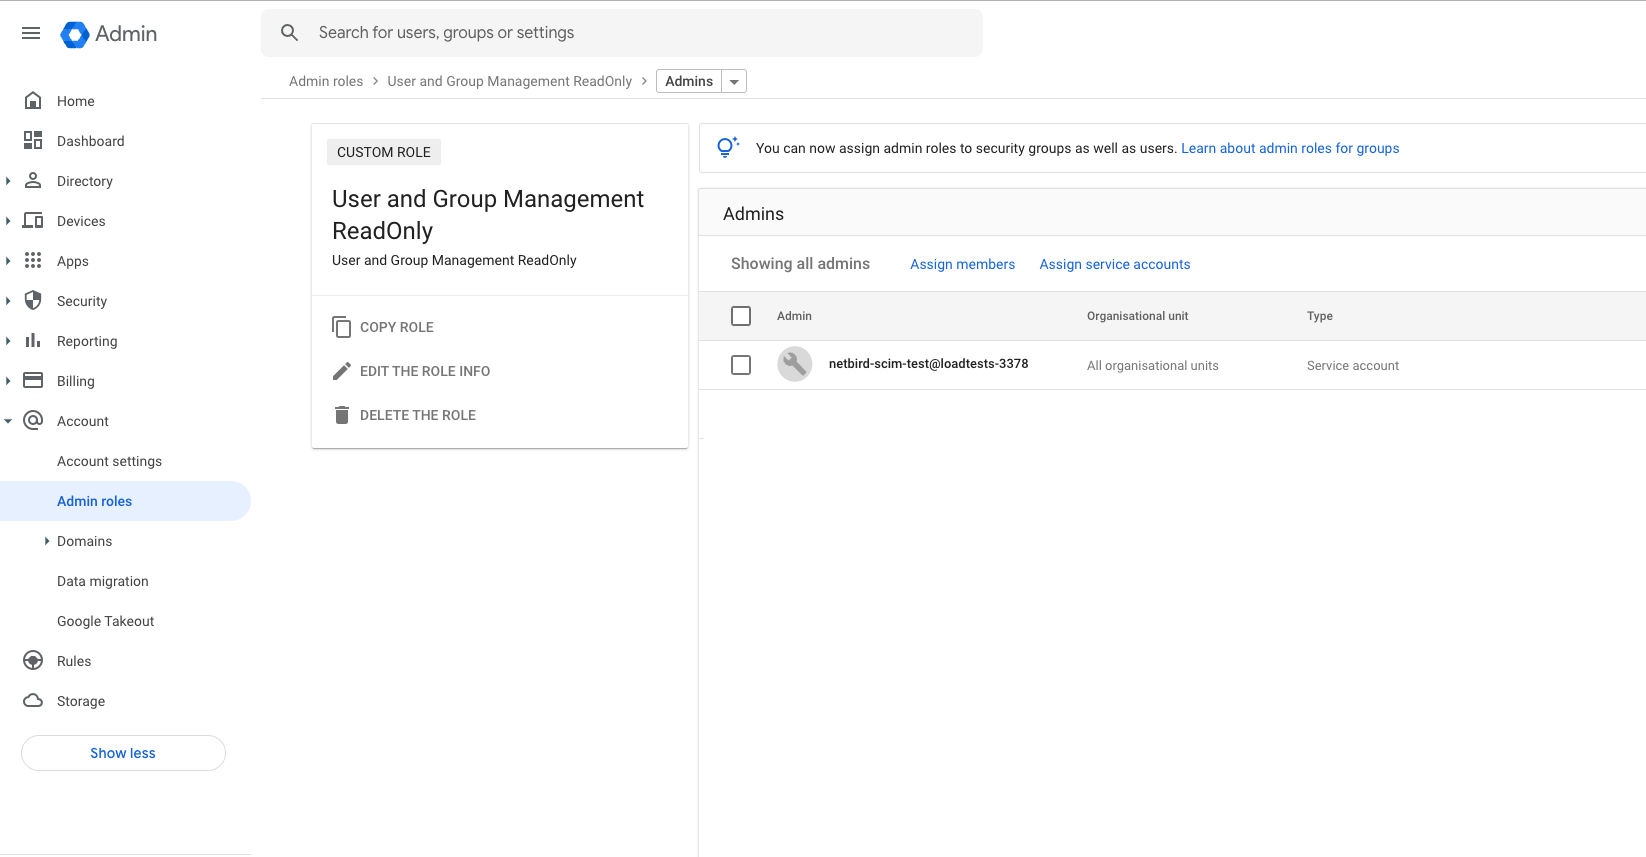
- Navigate to Account Settings page and take note of
Customer ID
Azure AD
Before you start creating and configuring an Azure AD application, ensure that you have the following:
- User account with admin permissions: You must have an Azure AD user account with the appropriate permissions to create and manage Azure AD applications. If you don't have the required permissions, ask your Azure AD administrator to grant them to you.
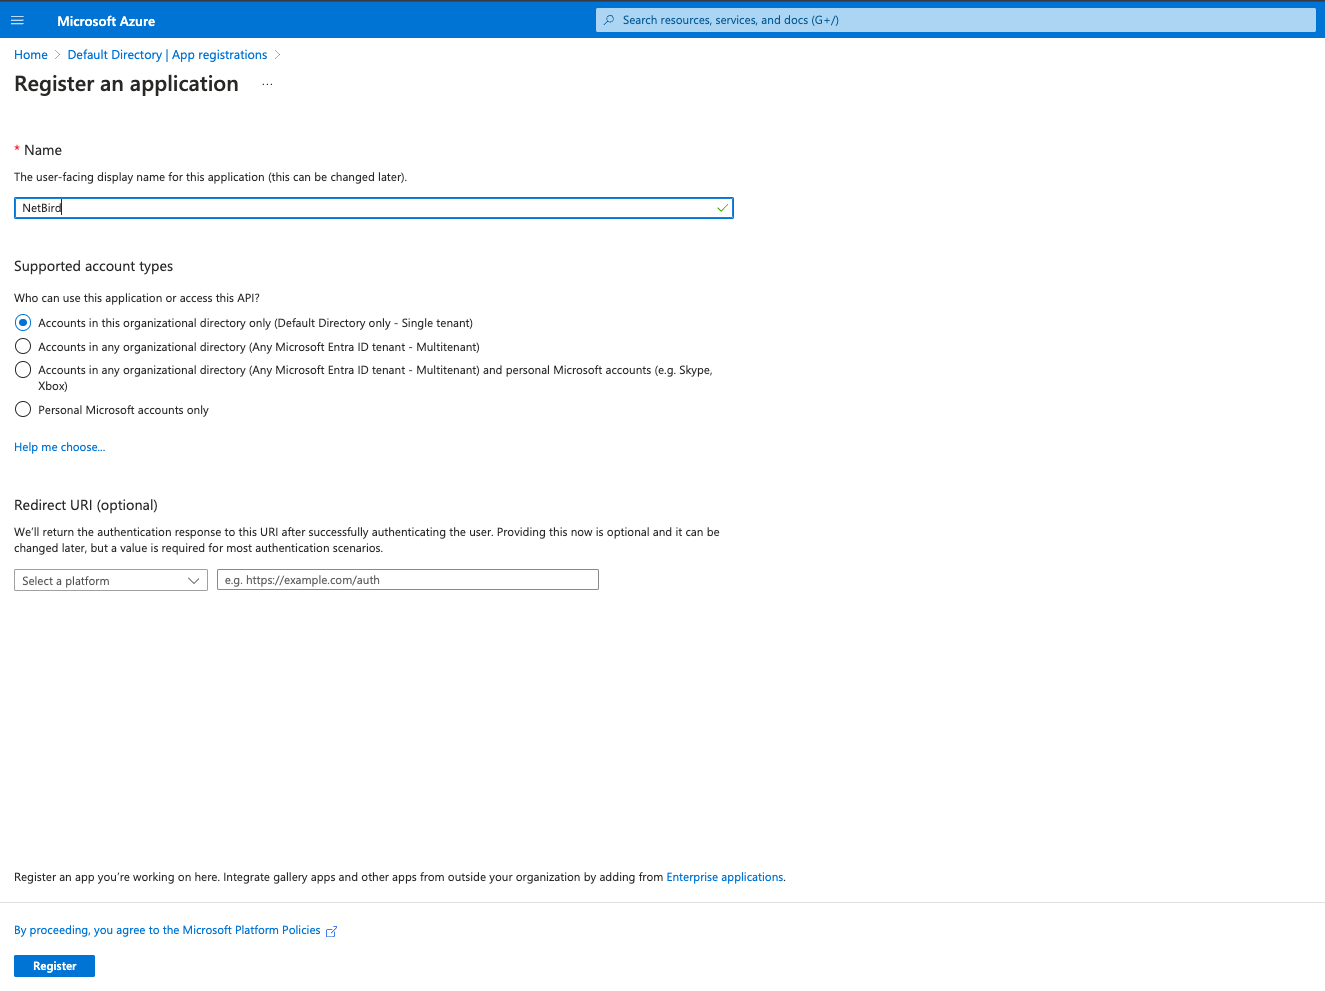
Step 1. Create and configure Azure AD application
- Navigate to Azure Active Directory
- Click
App Registrationsin the left menu then click on the+ New registrationbutton to create a new application. - Fill in the form with the following values and click
Register- Name:
Netzilo
- Name:
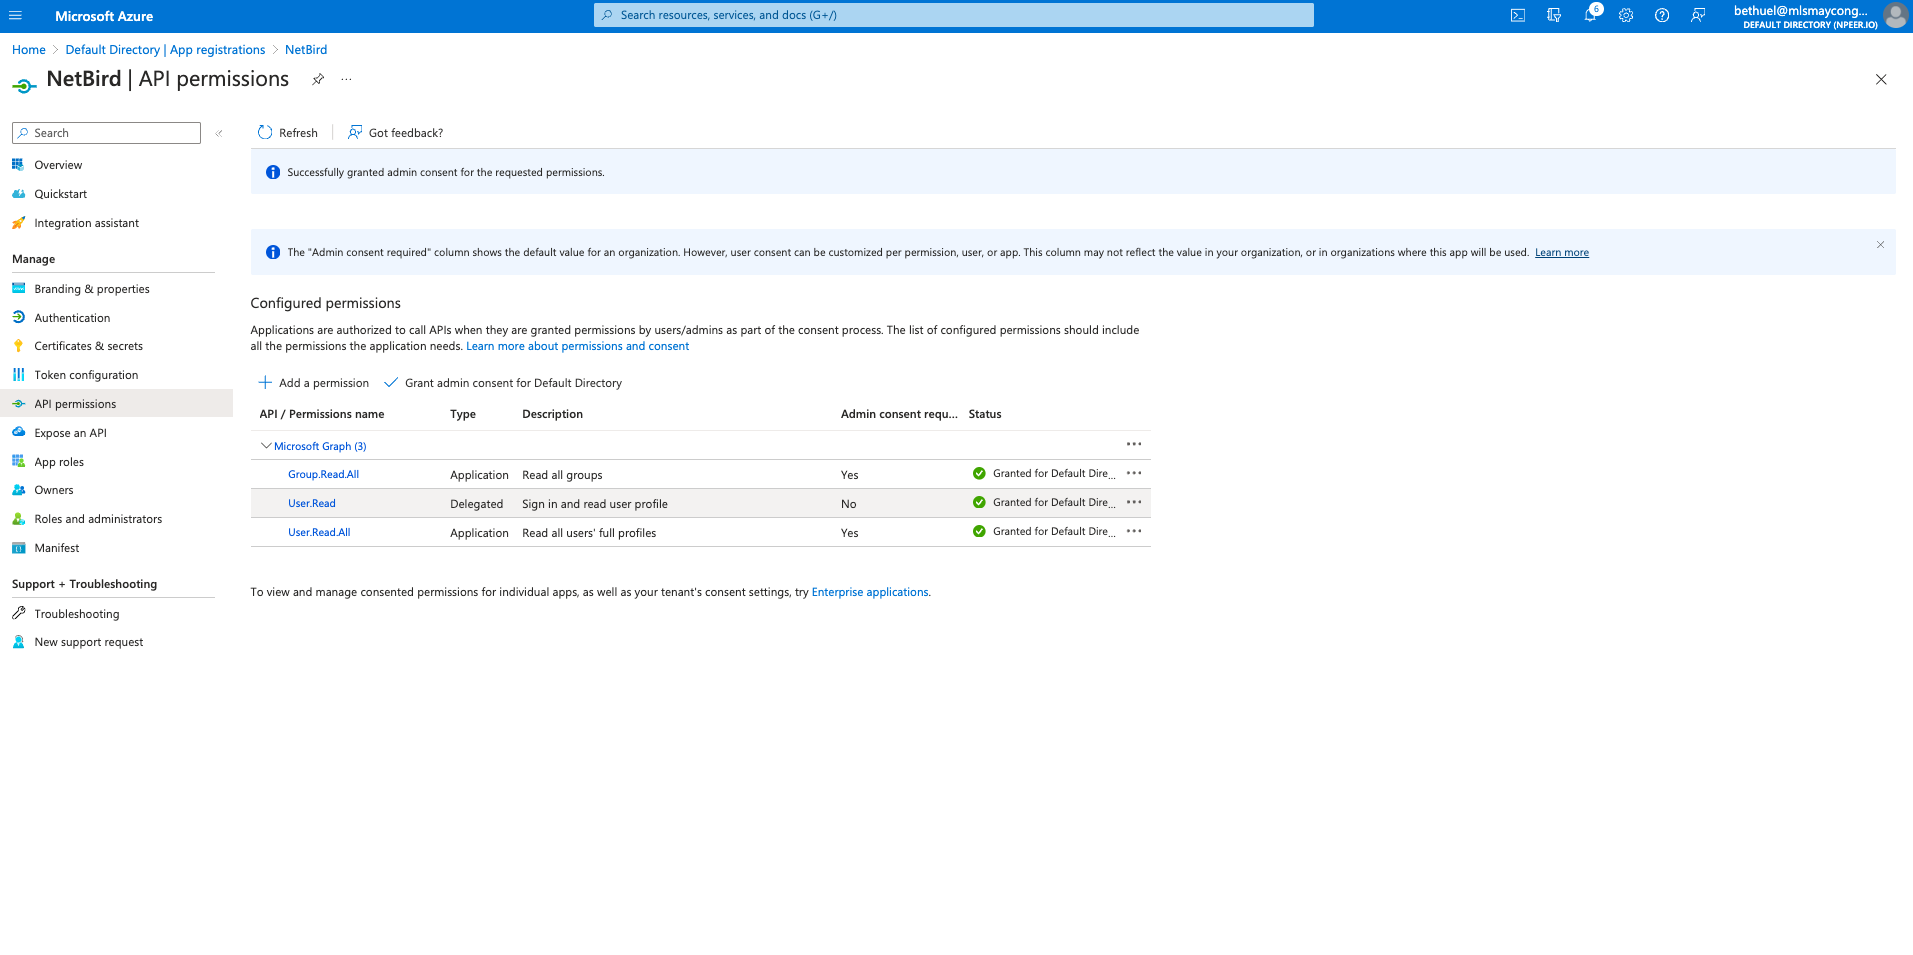
Step 2. Add API permissions
- Click
API permissionson the left menu - Click
Add a permission - Click
Microsoft Graphand then clickApplication permissionstab - In
Select permissionsselectUser.Read.AllandGroup.Read.Alland clickAdd permissions
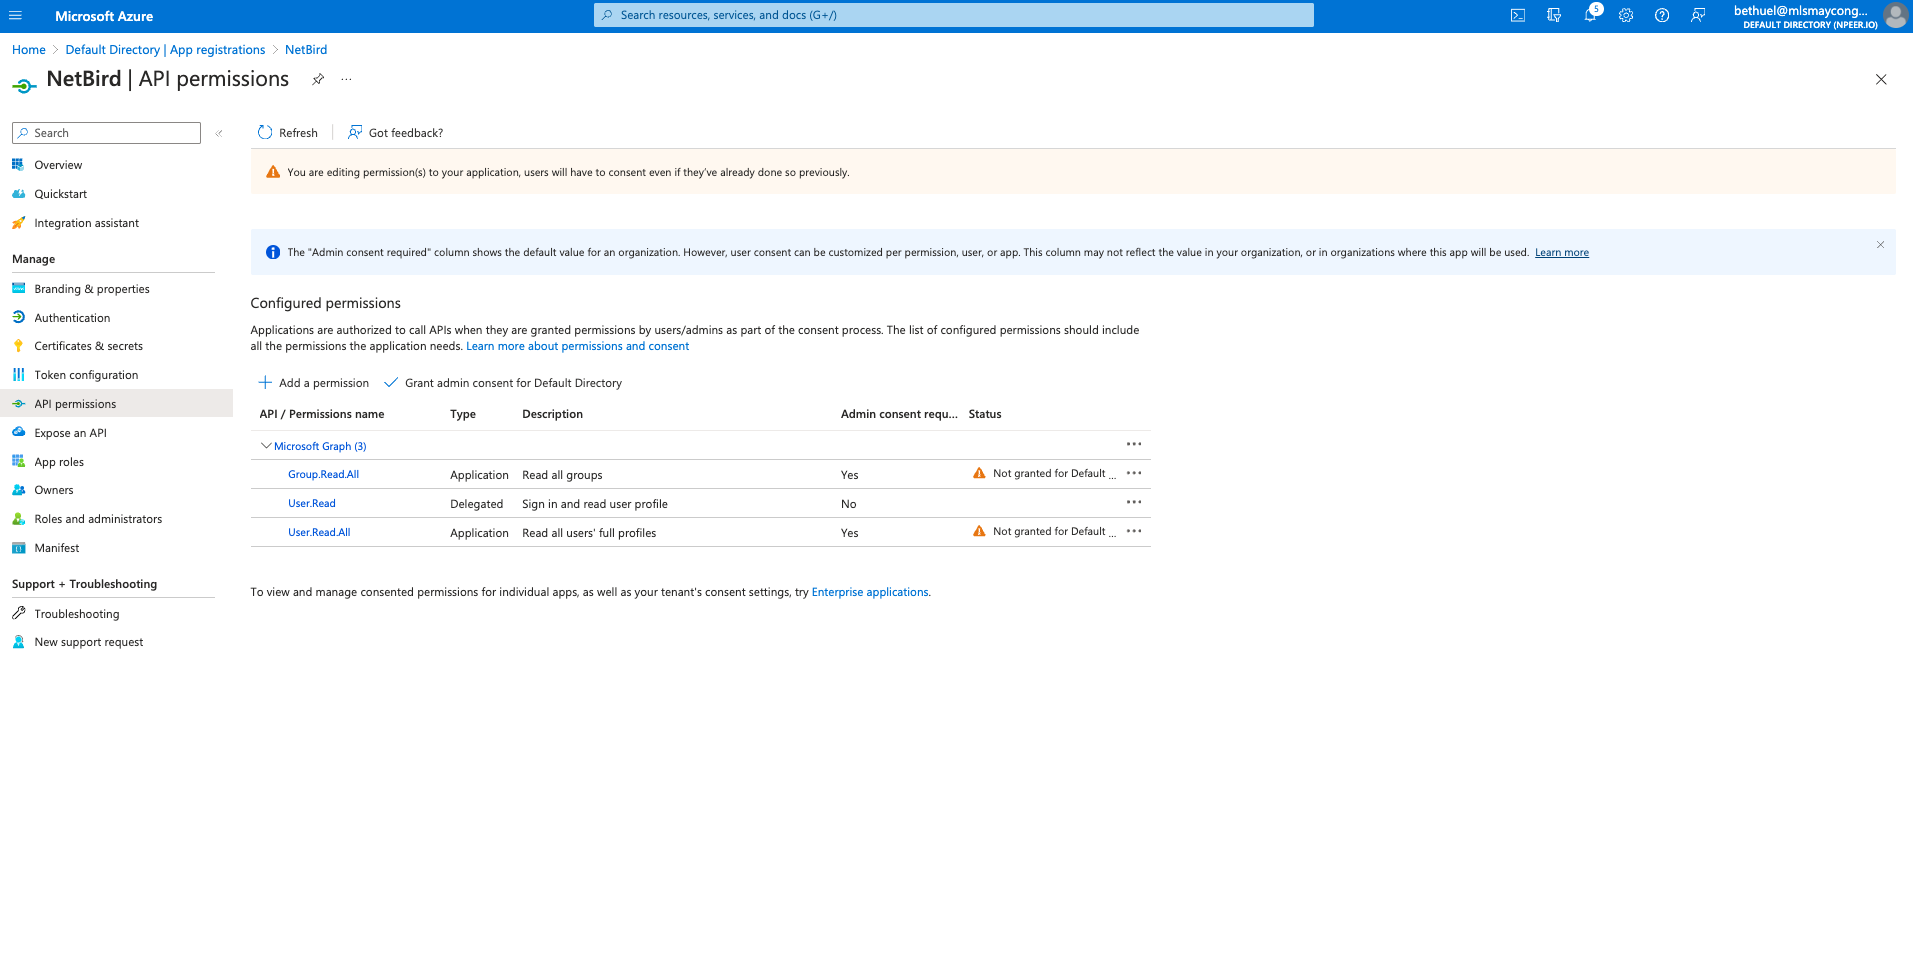
- Click
Grant admin consent for Default Directoryand clickYes
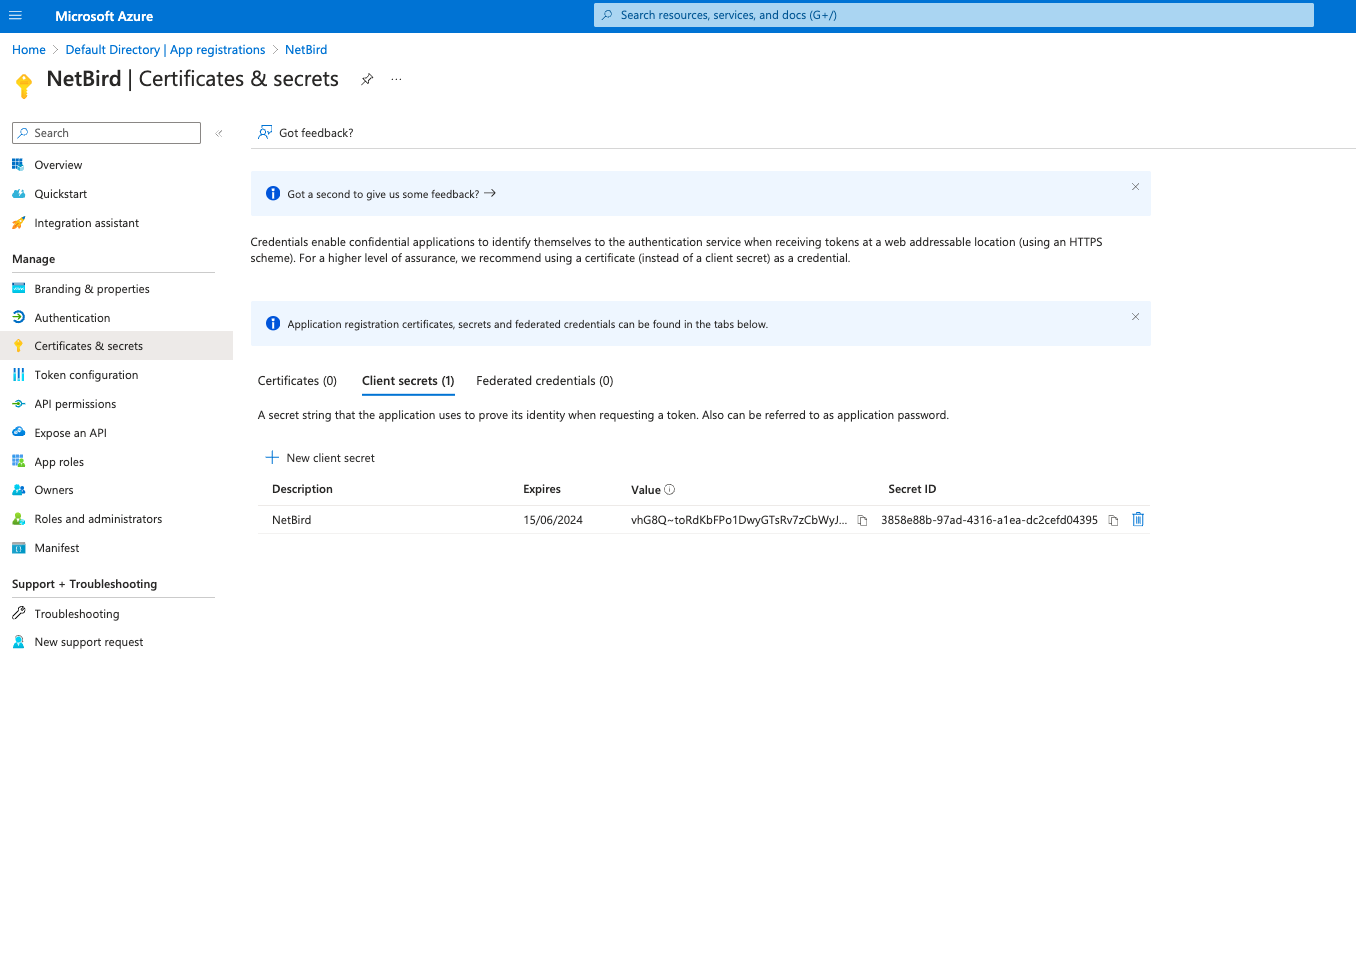
Step 3. Generate client secret
- Click
Certificates & secretson left menu - Click
New client secret - Fill in the form with the following values and click
Add - Description:
Netzilo - Copy
Valueand save it as it can be viewed only once after creation.
- Navigate to Owner applications.
- Select
Netziloapplication in overview page, take note ofApplication (client) IDandDirectory (tenant) ID.
Okta
If your organization relies on Okta for managing employee access, automating access to Netzilo via Okta's Provisioning feature can streamline your operations. This integration leverages SCIM (System for Cross-domain Identity Management) to ensure smooth synchronization of users and groups. For comprehensive insights into Okta's SCIM capabilities, please consult this article.
Prerequisites
- Begin by installing the Netzilo application from the Okta Integration Network
- Following installation, reach out to support to activate Okta SSO for your support.
Supported Features
OIDC Features
- SP-initiated SSO (Single Sign-On): Users must start authentication from Netzilo's login page
by entering their Okta email and clicking
Continue.
SCIM Features
- Create Users: Users added through Okta will automatically be created in Netzilo.
- Update User Attributes: Any changes to user attributes in Okta will be synchronized with Netzilo.
- Deactivate Users: Deactivating a user in Okta will also deactivate them in Netzilo.
- Group Push: Groups created in Okta will be synchronized to Netzilo.
Configuration Steps
Step 1: Configure SSO in Okta
- Access the Okta dashboard and navigate to
Applications > Applications, selecting the previously installedNetziloapplication. - Go to
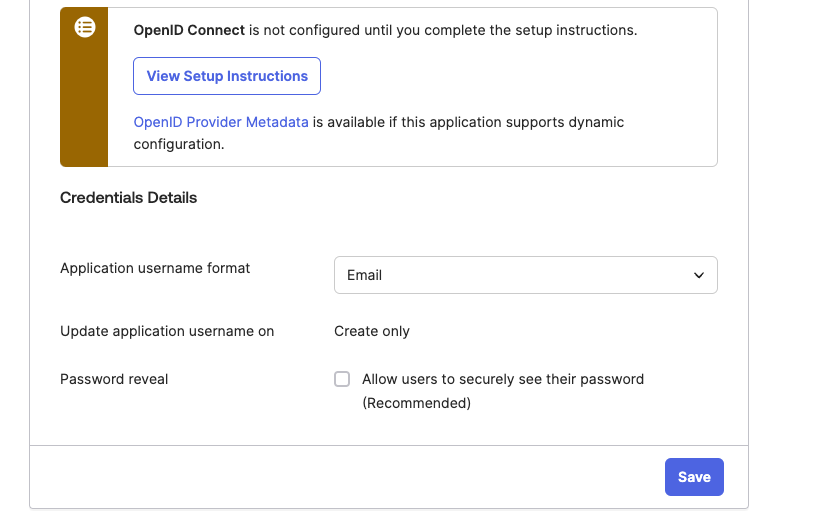
Sign On > Settingsand selectEdit. - In the
Credentials Detailssection, change theApplication username formattoEmailand selectSave.
Step 2: Enable Okta SCIM in Netzilo
- Log into Netzilo.
- Proceed to Integrations > Identity Provider and select
Connect Okta.
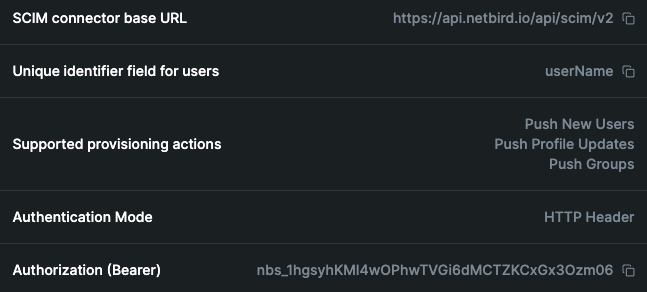
- Follow the displayed instructions to link your Okta account. Ensure to note the
Authorization(Bearer) tokengenerated for use in the subsequent step.
Step 3: Enable Provisioning in Okta
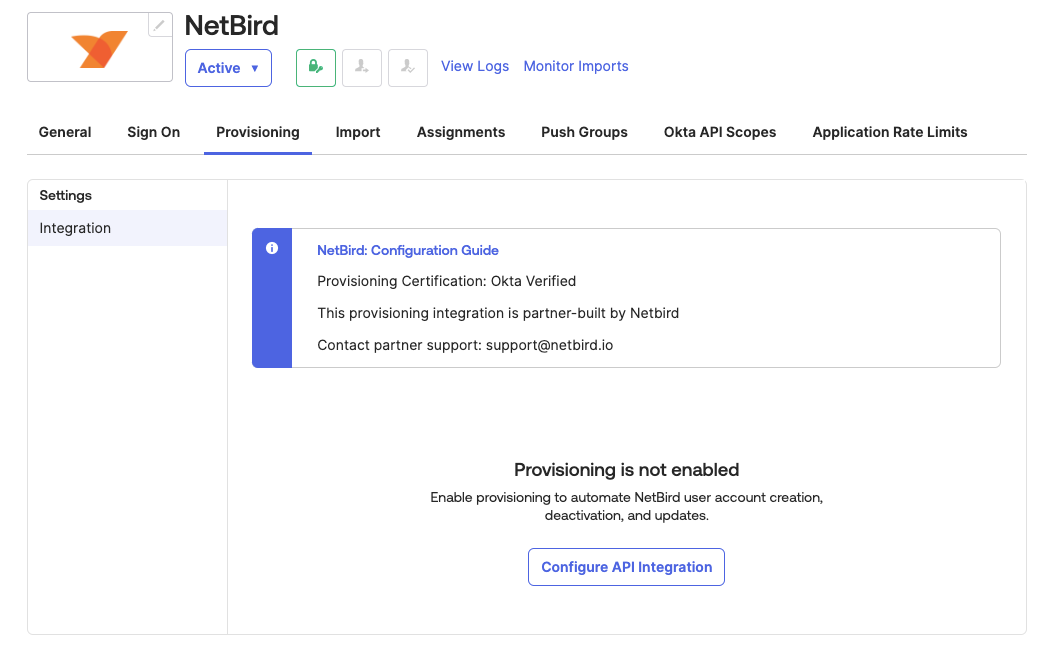
- From the Okta dashboard, navigate to
Applications > Applicationsand select theNetziloapplication. - Under the
Provisioningtab, chooseIntegration, then selectConfigure API Integration
- Opt to
Enable API integrationand insert previously notedAuthorization(Bearer) tokeninto theAPI Tokenfield.
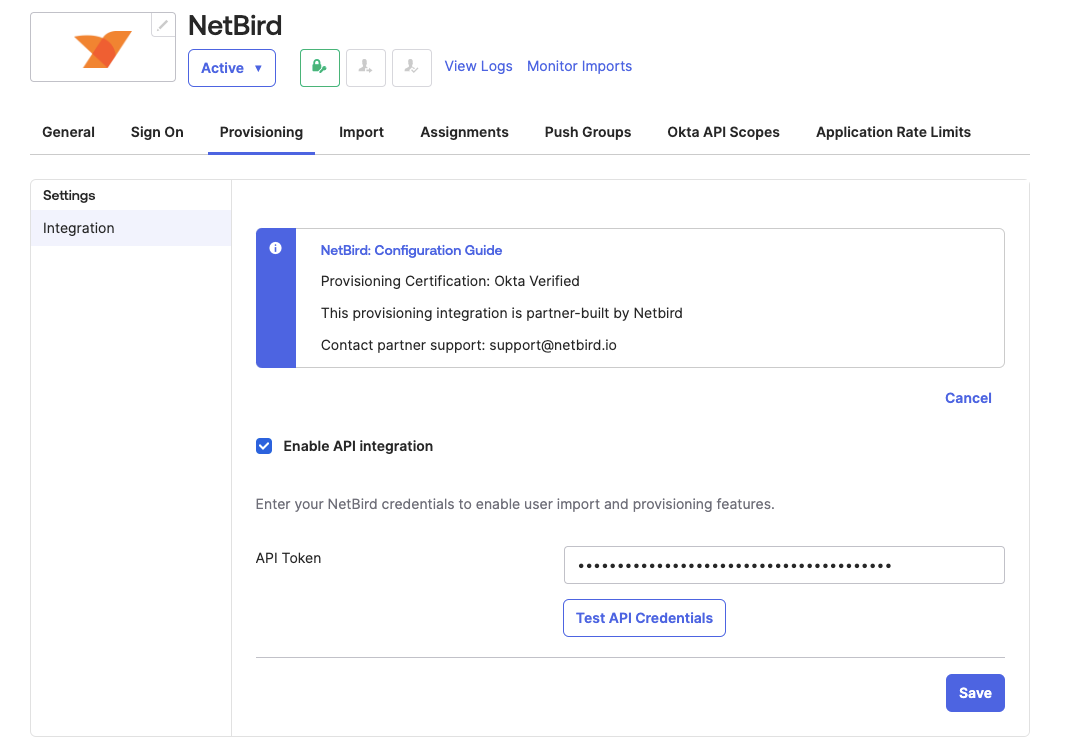
- Click
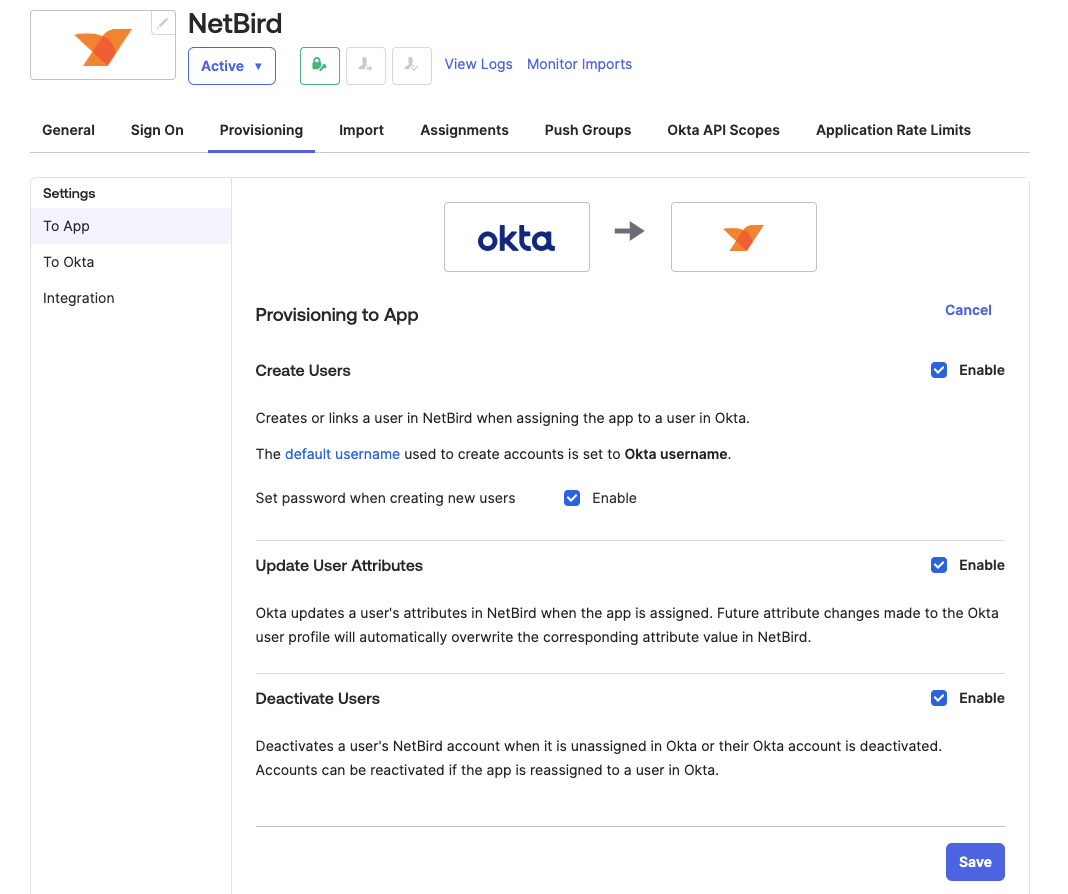
Test API Credentialsto verify the SCIM connection, then selectSave. - Navigate to
Provisioning > Settings > To App, clickEdit, enableCreate Users,Update User Attributes, andDeactivate Users, then selectSave.
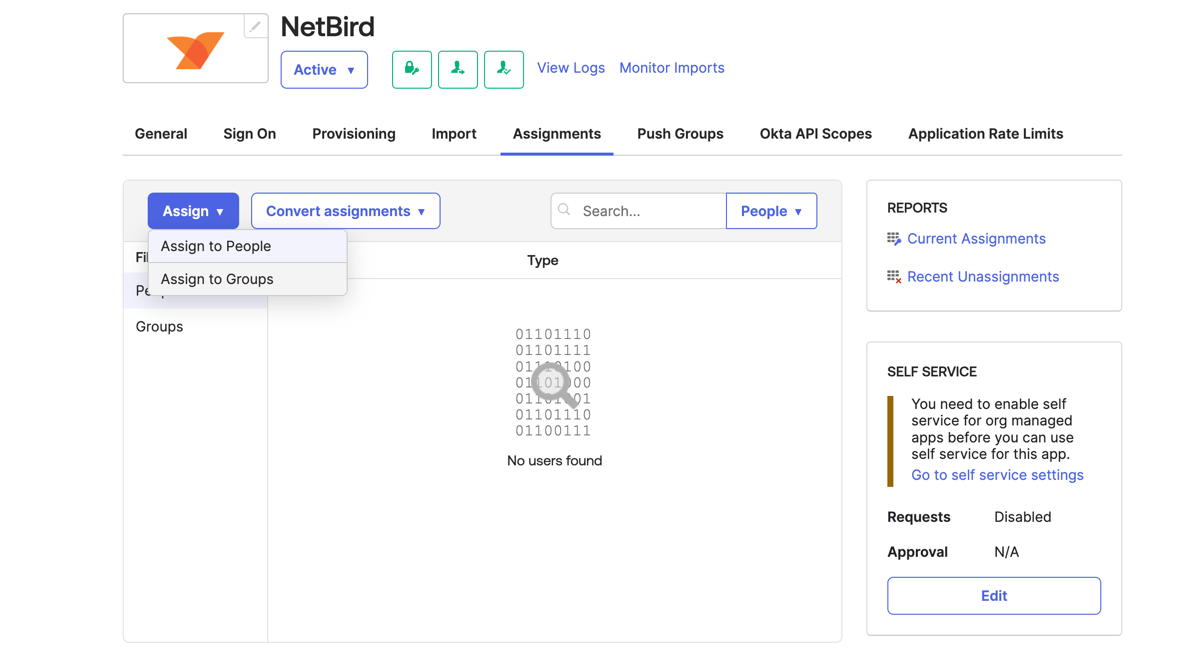
Step 4: Sync Users to Netzilo
- Access the
Assignmentstab, clickAssign, thenAssign to Groups. - Choose the groups for provisioning, select
Assignand thenSave and Go Back. - Click
Doneto conclude the group assignment process.
Step 5. Sync groups to Netzilo
- Access the
Push Groupstab
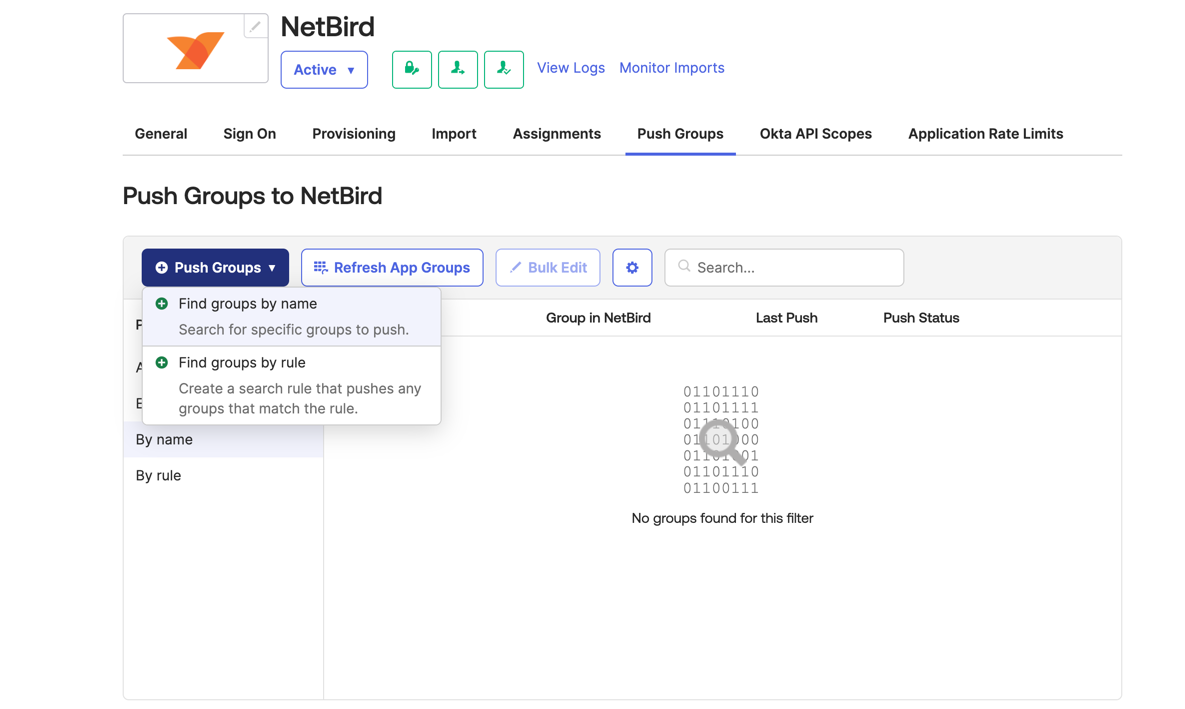
- Select the
Push Groupsand thenFind groups by name - Search groups to push and then click
Save - The selected groups will then be synced to Netzilo.
SCIM provisioning will manage only resources that are created through Okta. Any resources created directly in Netzilo will not be managed by SCIM.
Synced groups will only be available for membership and will not change the role of user in Netzilo.