

Users
Team > Users lists the people of your account. Here you add users, give them a role and the groups their devices join, block or delete them, and create access tokens for regular users.
Users with an e-mail address in your company's domain are added automatically the first time they sign in. Add a user here to invite someone in advance, to give them a password without an e-mail, or to set their role and groups before they sign in.
Roles
| Role | Can | Cannot |
|---|---|---|
| Owner (one per account) | Everything, including Settings > Plans & Billing and Settings > Tenant, and transferring ownership | |
| Admin | All administration | The owner-only items above |
| User | The Workplace: applications, their devices, the AI Workspace when an AI gateway is granted to them, and their own Profile Settings with self-service access tokens. Through the API they see only their own devices and what applies to them. | Any administration page |
| Agent | API access with the role it was given | Signing in. Agents are managed under Team > Agents, see Agents. |
The Users list
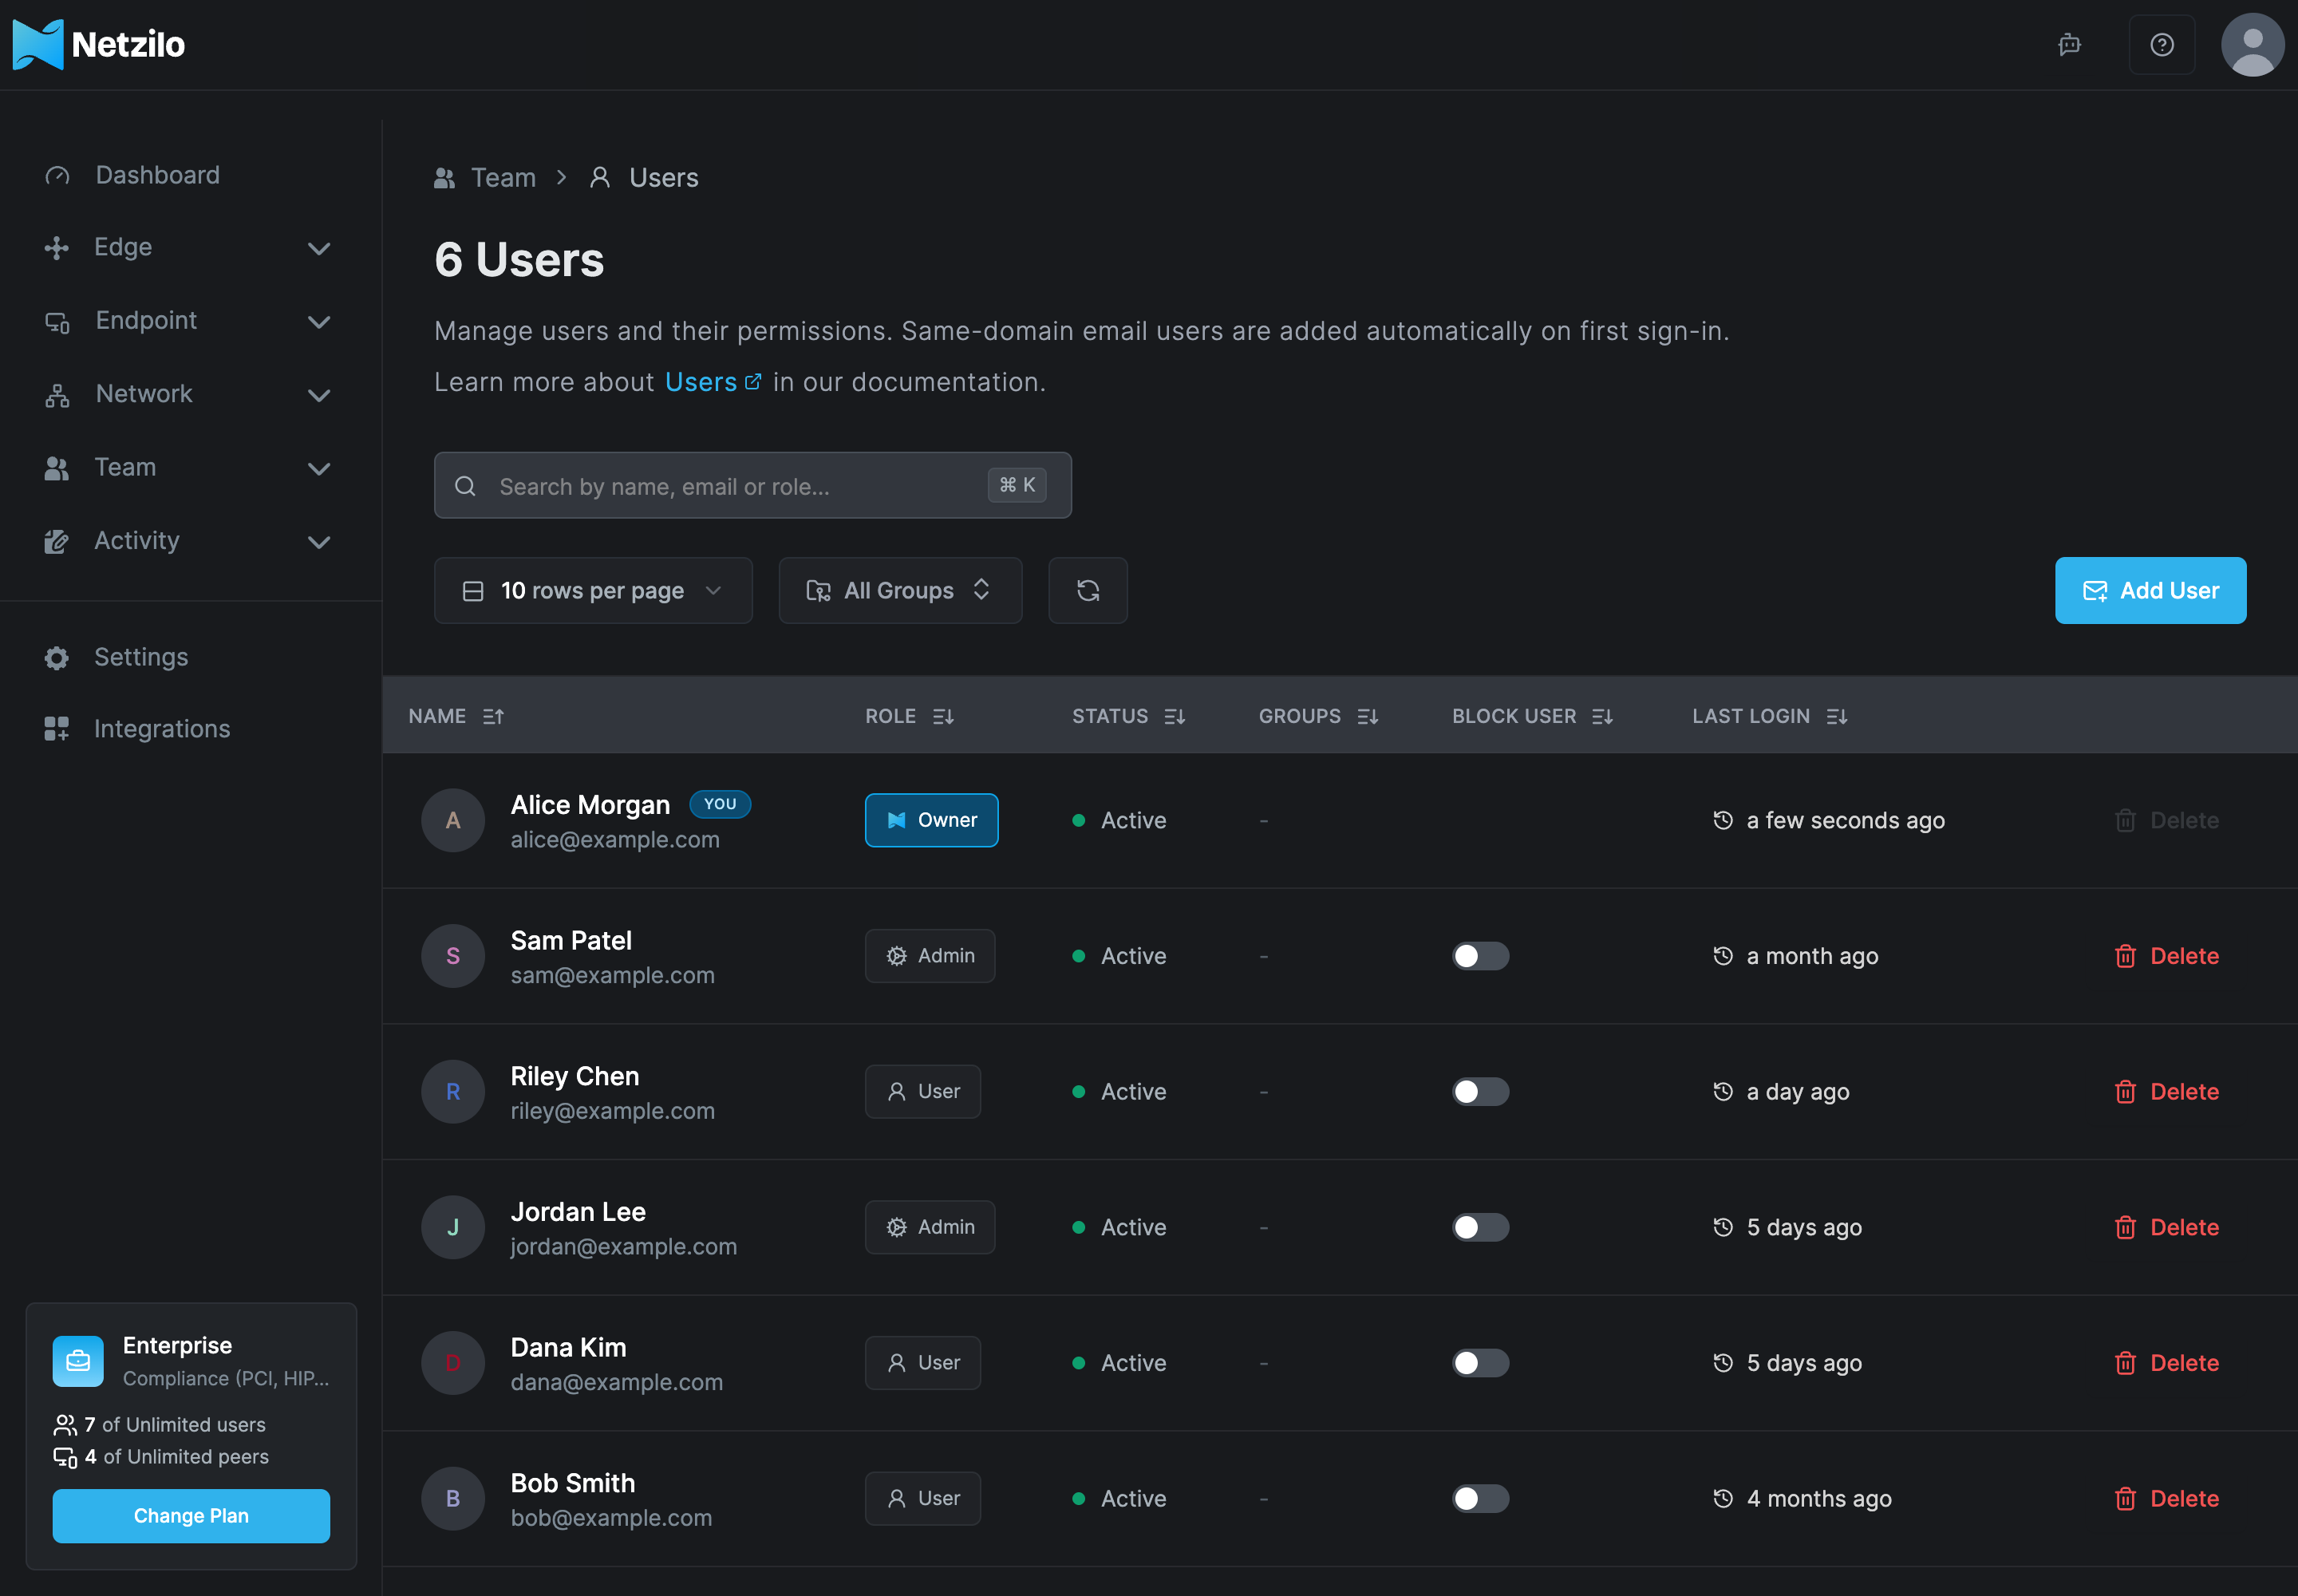
| Column | Shows |
|---|---|
| Name | Name and e-mail. You marks your own entry. |
| Role | Owner, Admin or User |
| Status | Active, Pending for an invited user who has not signed in yet, or Blocked |
| Groups | The user's auto-assigned groups |
| Block User | Blocks or unblocks the user at once. Not shown for yourself or the owner. |
| Last Login | When the user last signed in |
| Delete | Deletes the user. Not available for yourself or the owner. |
Add a user
- Go to Team > Users and click Add User.
- Fill in the dialog:
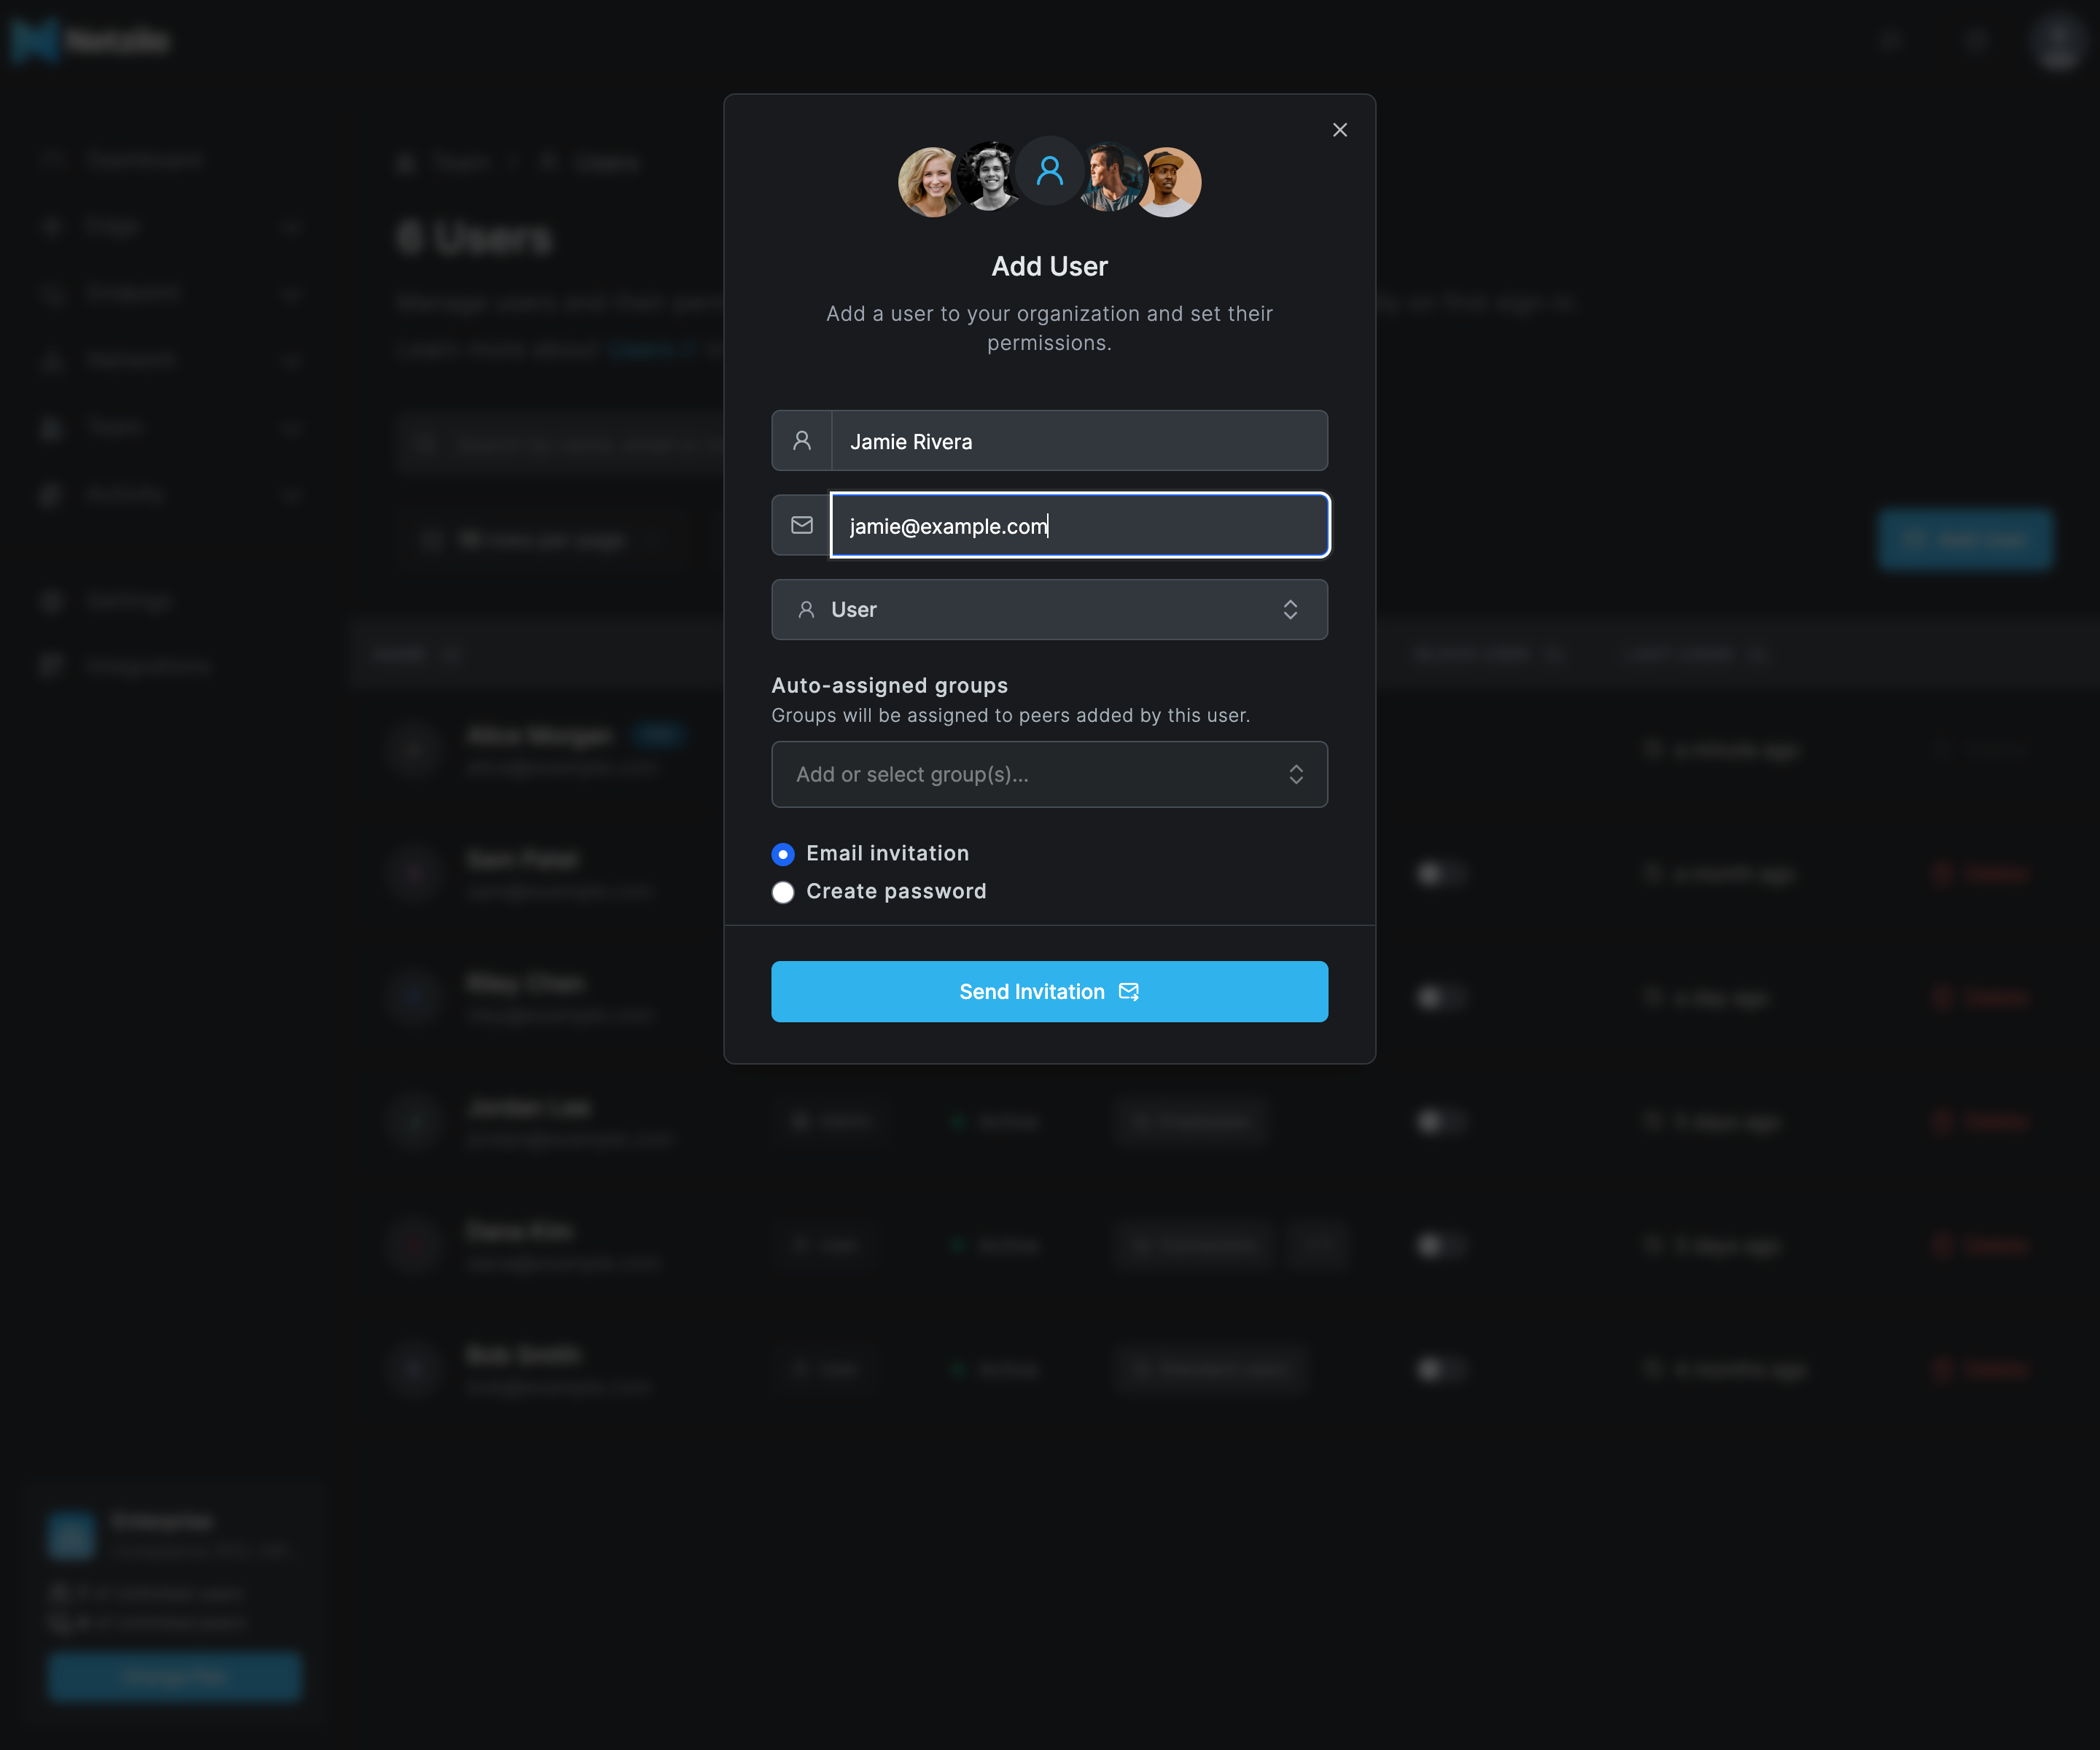
| Field | What to enter |
|---|---|
| Name | First and last name, both required |
| The user's e-mail address | |
| Role | User or Admin. To make someone owner, add them first and then transfer ownership. |
| Auto-assigned groups | Groups the user's devices join when the user adds them (Groups will be assigned to peers added by this user.) |
| Email invitation or Create password | How the user gets access, see below |
- Click Send Invitation or Create User.
Email invitation sends the user an e-mail to confirm. When they sign in, they join the account. The user appears as Pending until then.
Create password creates the account at once with a password you set. The password needs
at least 8 characters, with an uppercase letter, a lowercase letter, a number and one of
@$!%*?&.
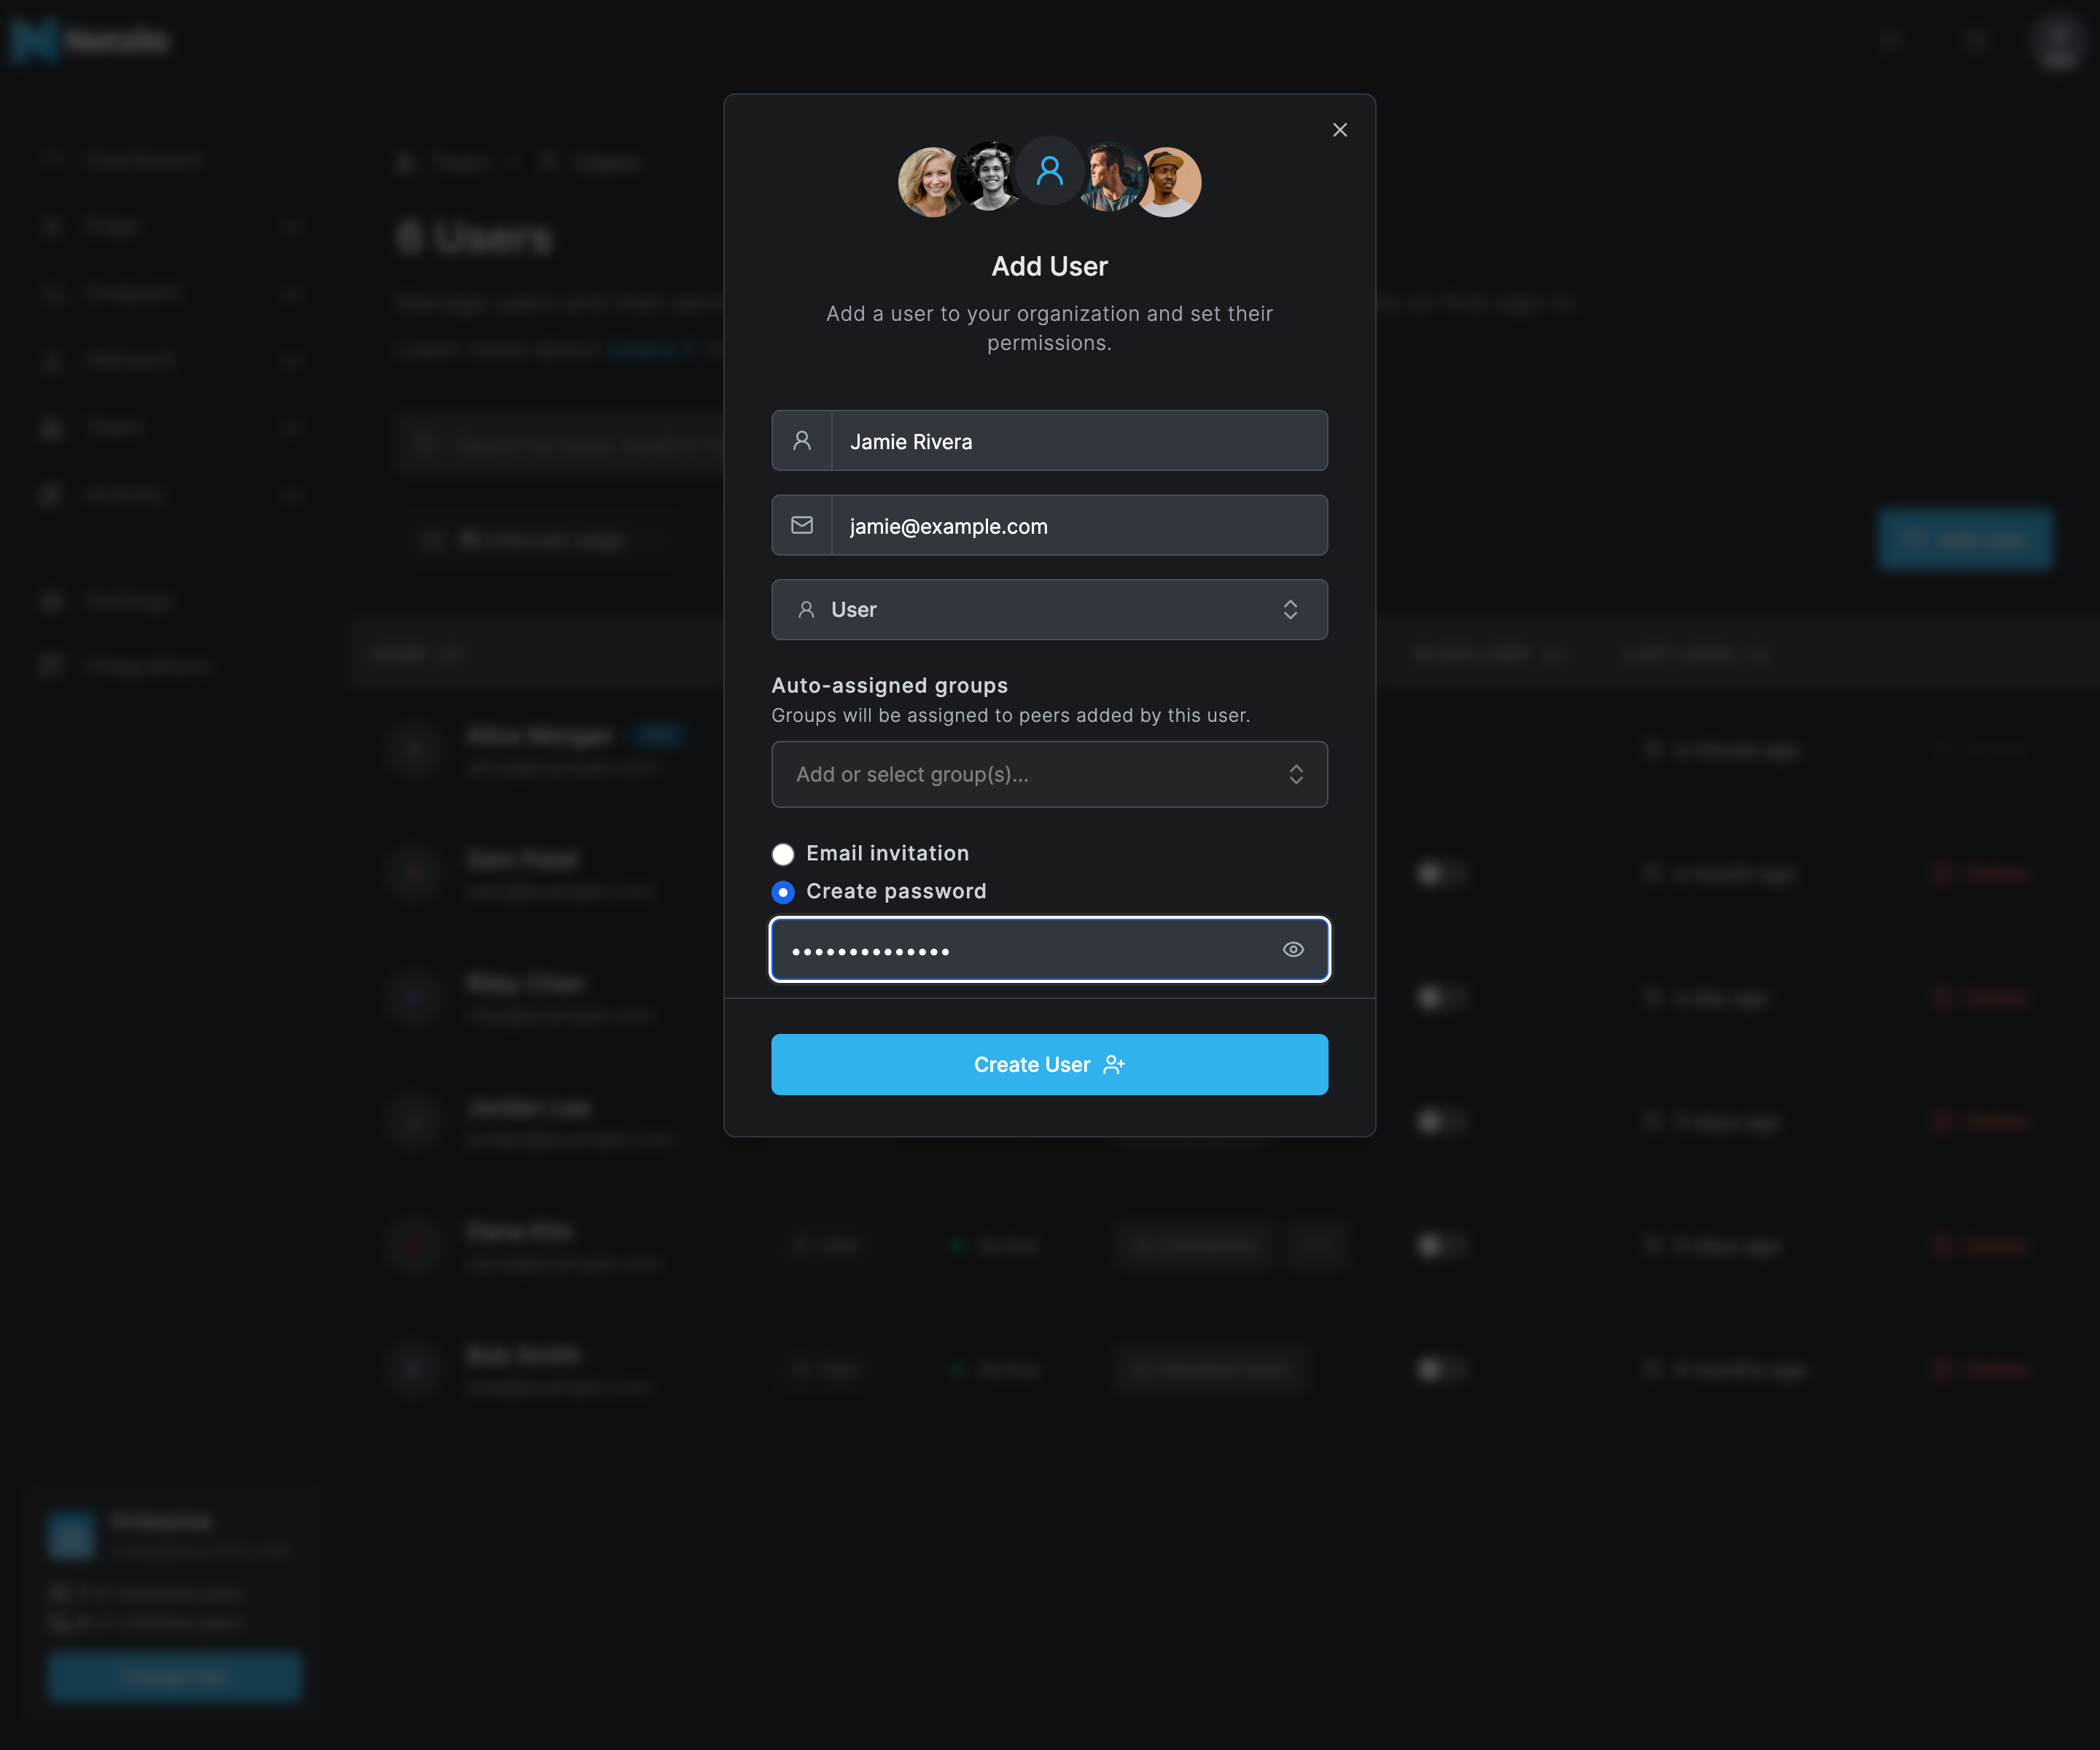
After Create User, the dialog User created successfully! shows the login name and the password once, with Copy to clipboard. Pass them to the user securely. At the first sign-in the user has to change the password.
On a self-hosted Netzilo Server, e-mail invitations need SMTP configured on the identity provider, which the installer does not set up. Until it is, use Create password. If the server answers IdP manager must be enabled to send user invites, use Create password too. See Identity provider and SSO.
You cannot invite someone who already has a Netzilo account.
Edit a user
Click a user in the list to open their page.
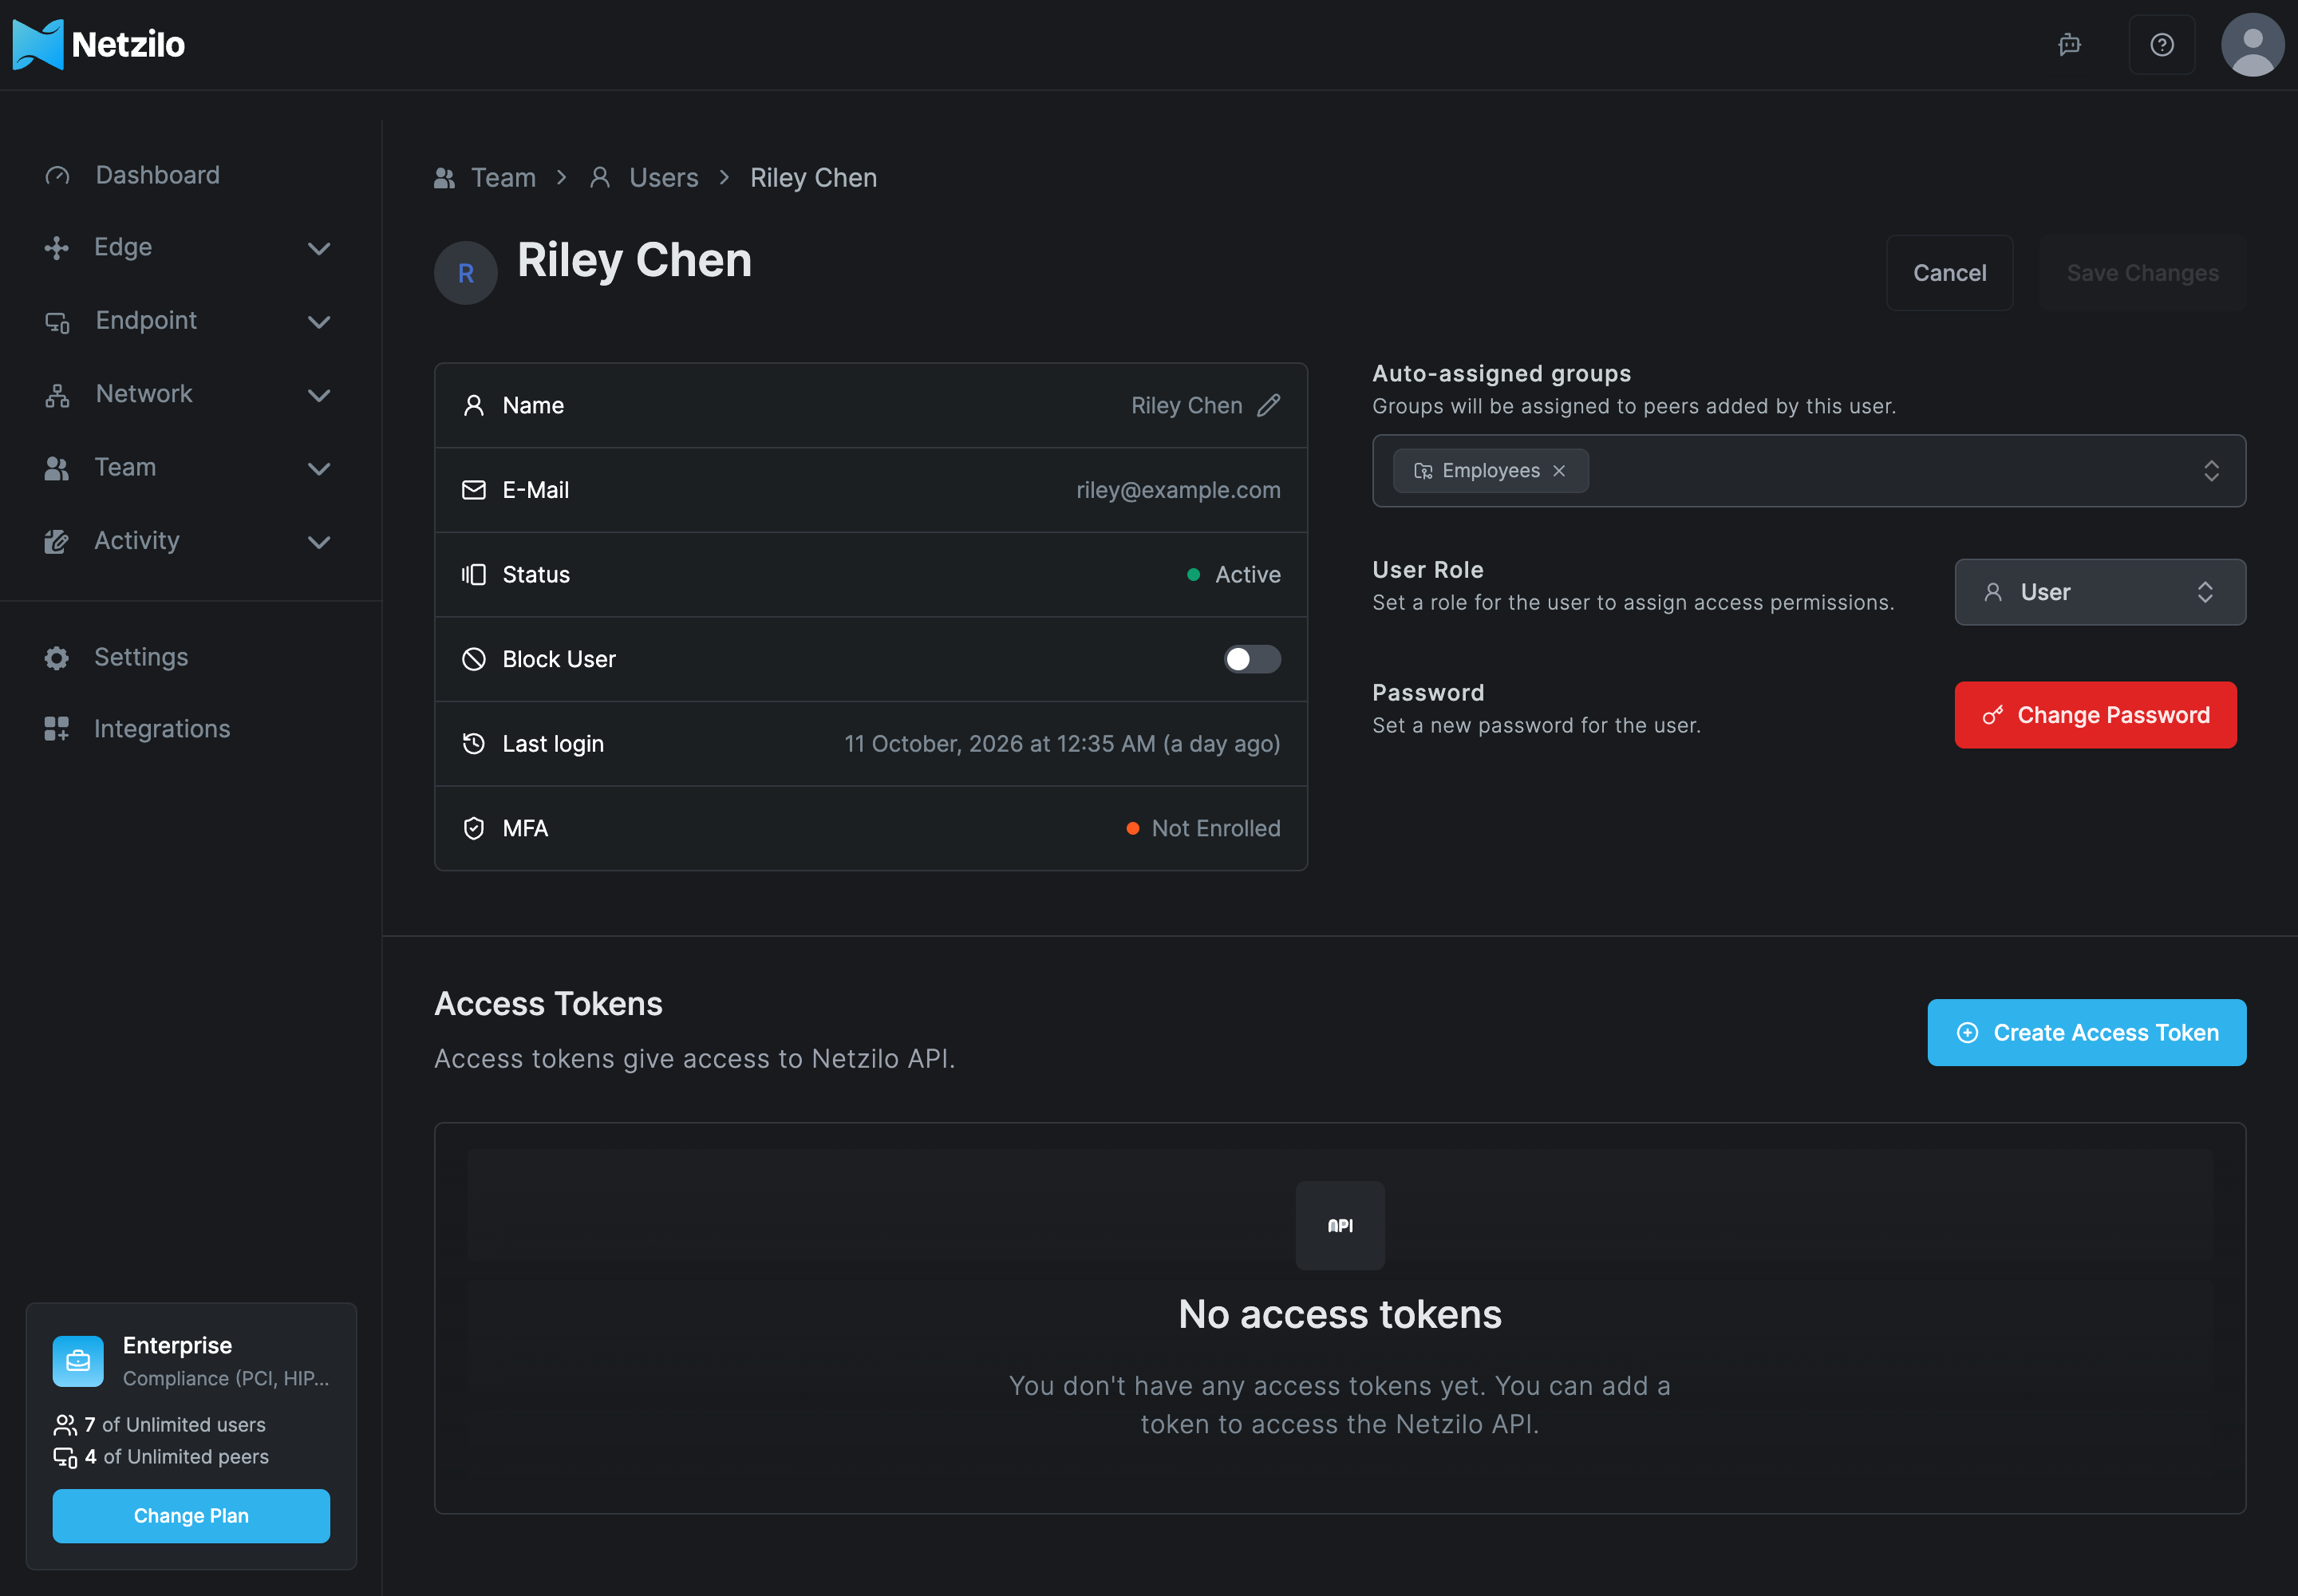
| Item | What it does |
|---|---|
| Name | Click the pencil to rename the user. |
| Block User | Blocks or unblocks the user. |
| MFA | Active with Reset MFA when the user enrolled a second factor, or Not Enrolled |
| Auto-assigned groups | The groups the user's devices join |
| User Role | The user's role |
| Password | Change Password sets a new password for the user. |
| Access Tokens | Tokens of this user, for regular users only, see below |
Click Save Changes. When you changed the groups, the dashboard asks Would you like to apply group change to user's peers? Answer yes to move the user's existing devices too; otherwise only devices added later get the new groups.
Change a user's role
Open the user, pick the role under User Role and click Save Changes.
To make another user the owner, pick Owner. The dialog Transfer Ownership? explains that you become an admin, and that only the new owner can transfer the role back. Only the owner can do this.
The role selector is disabled, without a message, in the cases listed under Changes that are refused.
Access tokens for a regular user
Administrators can create access tokens on a regular user's page, for example for a script that must act as that user. The Create Access Token dialog warns: This token acts as (user), with their role and everything they can reach, through the API and the gateway. Give it only to (user), keep its expiry short, and delete it when it is no longer needed. Its use is recorded as (user).
For automation that is not tied to a person, use an agent, see Agents. Users manage their own tokens under Profile Settings. You cannot create tokens for another admin or for the owner.
Remove a user
- Turn on Block User. The user loses access at once and their devices disconnect. Blocking can be undone.
- When you are sure, click Delete in the list. Deleting this user will remove their devices and remove dashboard access. This action cannot be undone. On a self-hosted server the user is also removed from the identity provider.
- If the user had access to an agent's tokens, create new tokens for that agent and delete the old ones.
Changes that are refused
These protections are deliberate:
| Attempt | Result |
|---|---|
| Delete your own account | Refused: self deletion is not allowed |
| Delete the owner | Refused: transfer ownership first |
| Block the owner, or block or unblock yourself | Refused |
| Change your own role | Refused: another admin must do it |
| Grant or remove the owner role | Only the owner can |
| Add someone directly as owner | Refused: add, then transfer |
| Create a token for another admin or the owner | Refused: they create their own |
Plan limits
The Free plan allows 5 users, and agents count towards them. Adding a sixth user fails with maximum number of users reached. Delete a user or change the plan, see Plans & Billing.
Events
User changes are recorded under Activity > Events: user invited, joined, role changed, blocked and unblocked, deleted, groups changed, and access tokens created and deleted.
Troubleshooting
The invited user never gets the e-mail. On a self-hosted server the identity provider has no SMTP configured. Configure it, or delete the pending user and add them again with Create password.
A user signs in but sees only the Workplace. Their role is User. Change it to Admin if they should administer the account.
A user sees only the install page. Disable portal access for regular users is on under Settings > Permissions.
A user's devices lack the new groups. You answered no to applying the group change to their peers, or group propagation is off under Settings > Groups. Save again and answer yes.
You cannot change a role, or the role selector is disabled. See Changes that are refused.
A user's token stopped working. It expired, was deleted, or the user is blocked. Create a new one.
Related Documentation
- Agents - Service accounts and access tokens for the API
- Profile Settings - What each user manages for themselves
- Groups - Group propagation and JWT group sync
- Authentication - Login expiration for users' devices
- Identity provider and SSO - SSO and SMTP on a self-hosted server
- Plans & Billing - User and device limits