

Groups
Groups are how Netzilo decides who reaches what. Policies, routes, DNS, setup keys, profiles and filters all point at groups, never at single users or devices. The Groups tab controls how users and their devices get into groups, and lists every group with what uses it.
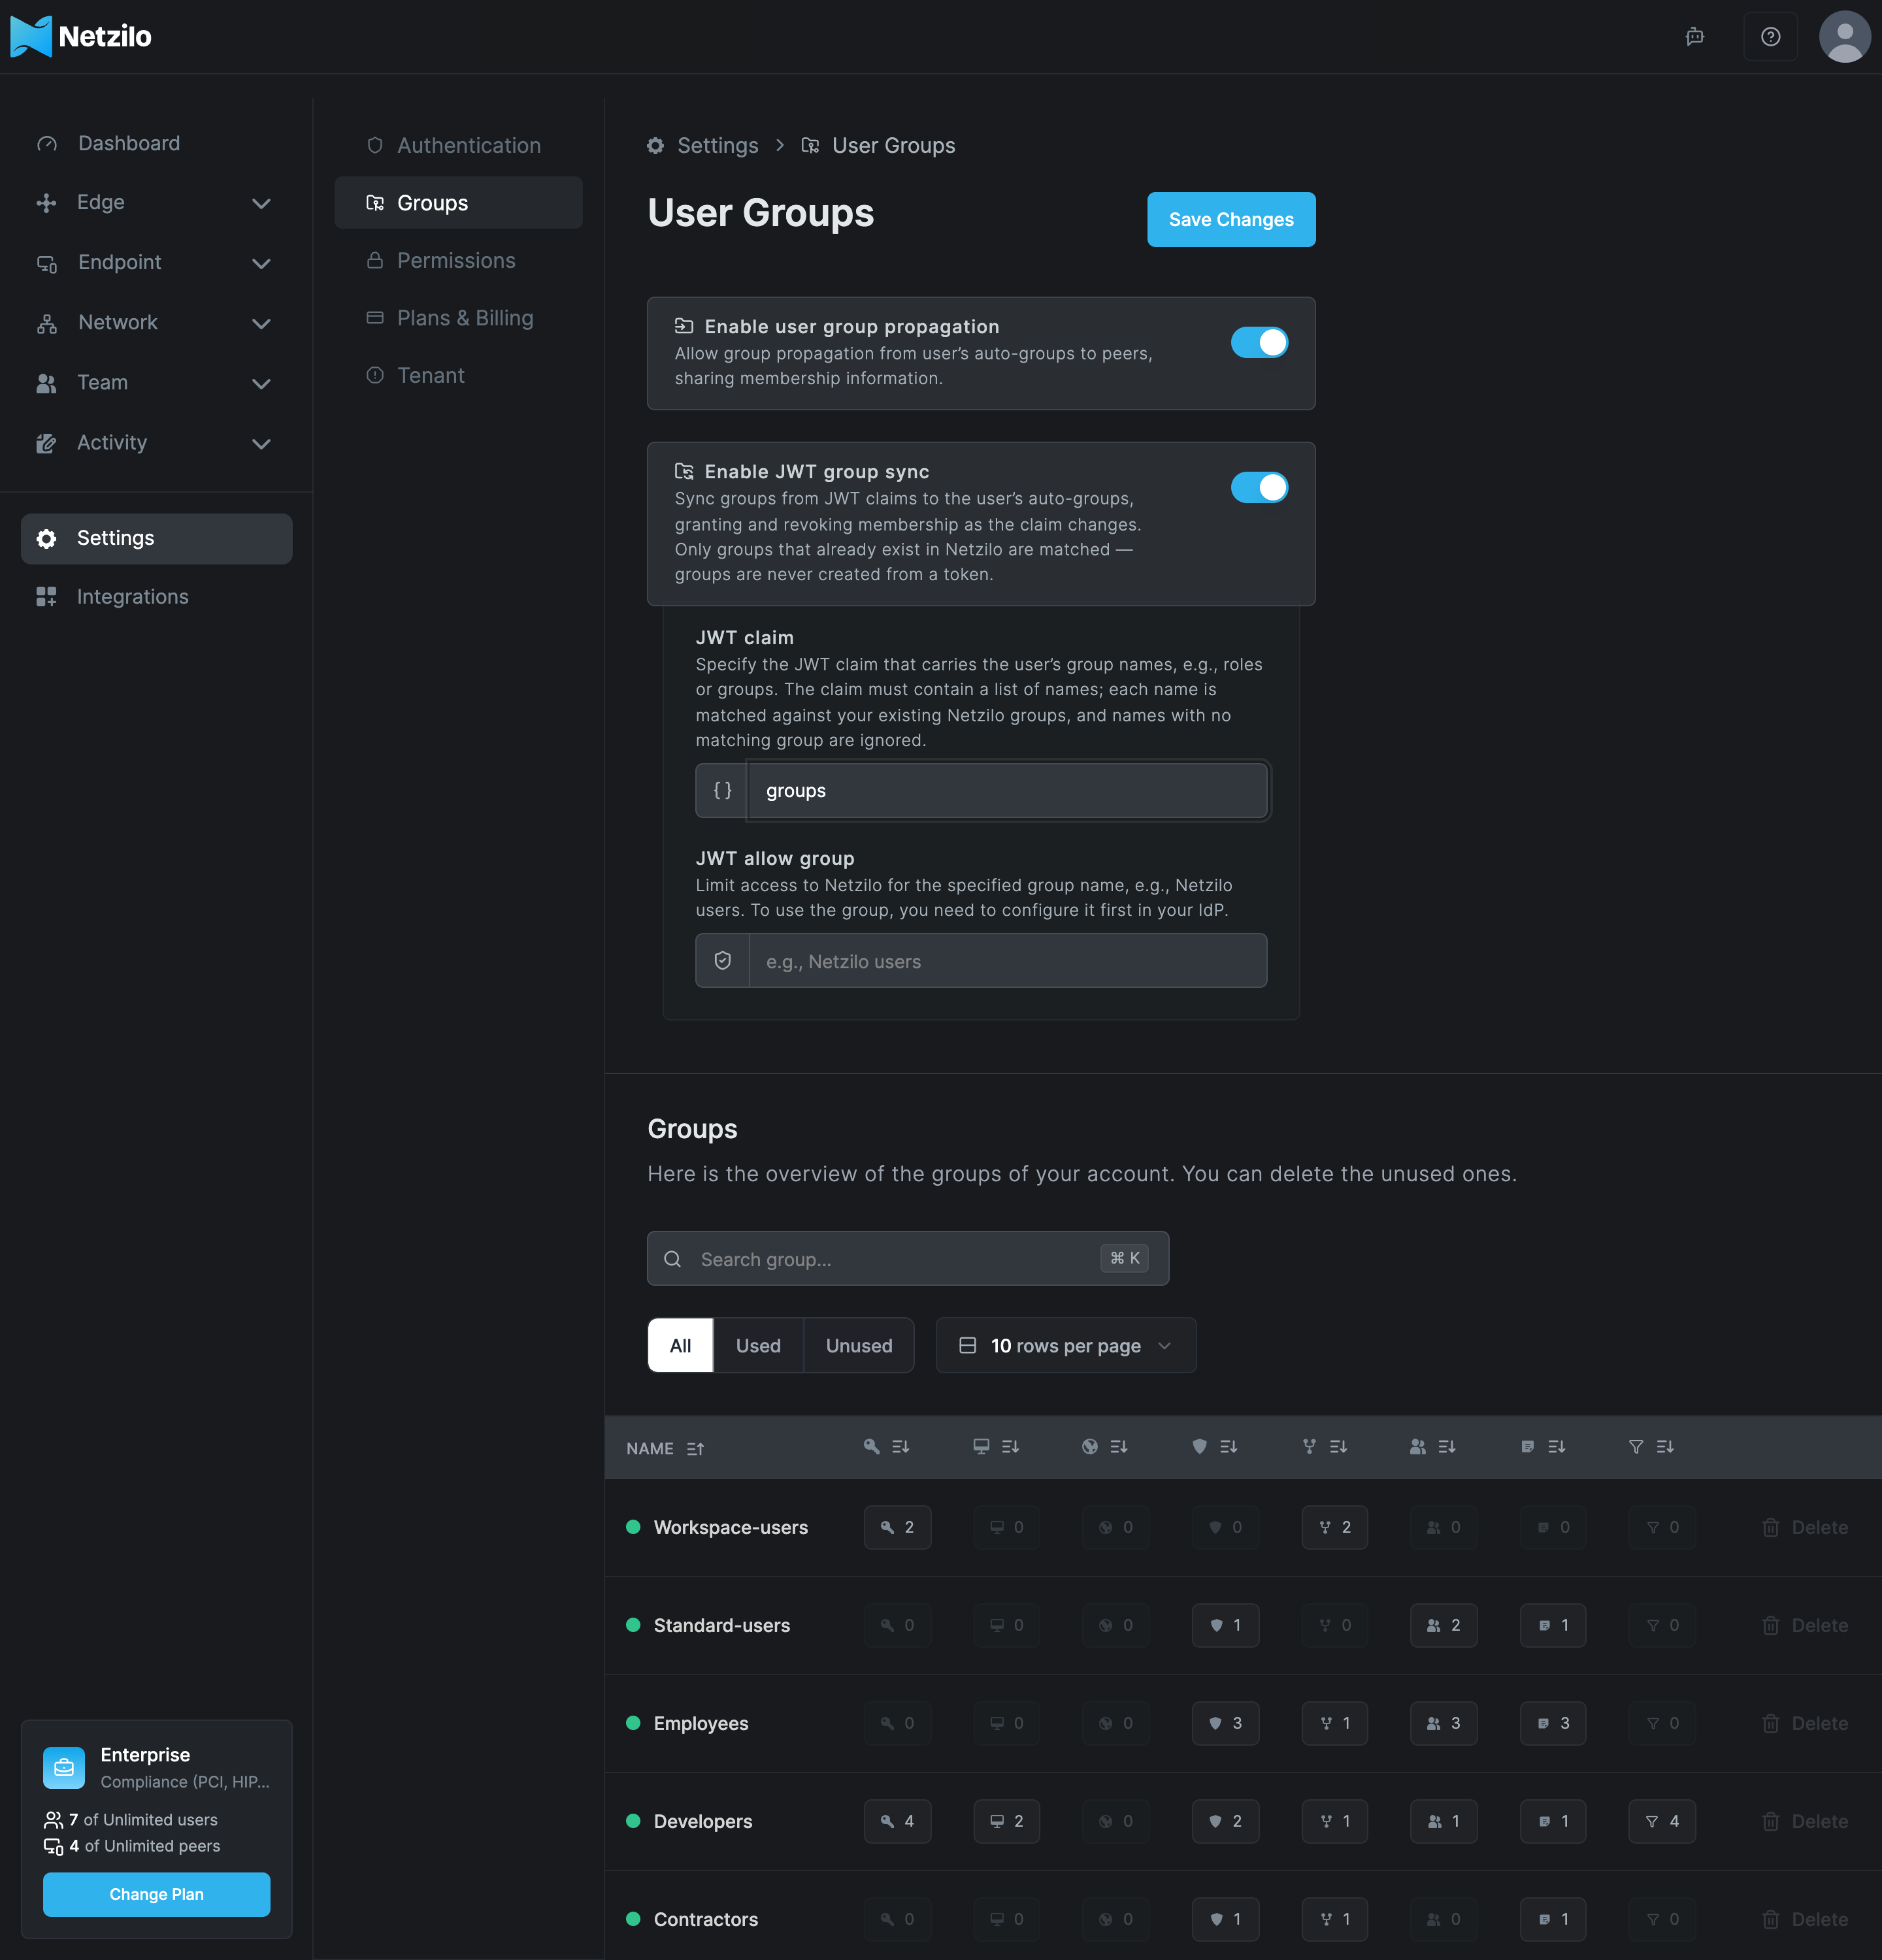
You find it under Settings > Groups. The page inside the tab is titled User Groups, and the Groups table is below the settings.
How it works
A device can join a group in several ways:
- By hand. An administrator assigns the peer to groups in Endpoint > Peers.
- Through a setup key. A device added with a setup key joins the key's auto-groups.
- Through its user. Each user has Auto-assigned groups (Team > Users). With Enable user group propagation on, the user's devices are in the same groups.
- Through the identity provider. With Enable JWT group sync on, the group names in the user's sign-in token decide which of the user's auto-groups they have.
Groups themselves are created by an administrator: type a new name in any group selector and press Enter, or create it through the API. A sign-in token never creates a group.
Enable user group propagation
Turn on Enable user group propagation to give each user's devices the groups the user has. Then you manage membership once, on the user, and every device the user adds follows.
- Go to Settings > Groups.
- Turn on Enable user group propagation.
- Click Save Changes.
With propagation off, a user's groups do not reach their devices, and you assign device groups by hand or through setup keys.
Sync groups from your identity provider
Enable JWT group sync reads a list of group names from the token your identity provider issues at sign-in. Each name is matched against the groups that already exist in Netzilo. A match adds that group to the user's auto-groups. When the name disappears from the token, the group is removed again at the next sign-in. Names with no matching group are ignored.
Groups are never created from a token. Create every group you want to sync in Netzilo first, with exactly the name your identity provider sends. Matching is by name, so keep group names stable.
- Create the groups in Netzilo, with the same names your identity provider uses.
- Go to Settings > Groups and turn on Enable JWT group sync.
- In JWT claim, enter the name of the claim that carries the group names, for example
groupsorroles. The claim must hold a list of names. - Optional: in JWT allow group, enter one group name to limit who can sign in to Netzilo at all.
- Click Save Changes.
| Field | What to enter |
|---|---|
| Enable JWT group sync | On: group membership follows the token. |
| JWT claim | The claim name, such as groups. Spaces are not allowed. If it is empty, nothing is synced. |
| JWT allow group | Optional. One group name from your identity provider, such as Netzilo users. Only users who carry that group in their token can sign in. Configure the group in your identity provider first. |
When you save with a JWT allow group, the dashboard asks for confirmation:
Only users part of the <group> group will be able to access Netzilo. The warning
To prevent losing access, ensure you are part of this group. means exactly that: put
yourself and the other administrators in the group before you save.
On a self-hosted Netzilo Server, the token comes from the built-in identity provider. It passes on the group claim of your company identity provider only after you set that up, see Identity provider and SSO. Test with one user before you turn on group sync for everyone.
Review and delete groups
The Groups table lists every group with a count for each kind of object that uses it. Hover over a column header to see its name: Setup Keys, Peers, DNS, Access Controls, Network Routes, Users, Profiles and Filters. Hover over a count to read it in words, for example Group developers is used in 2 Peer(s).
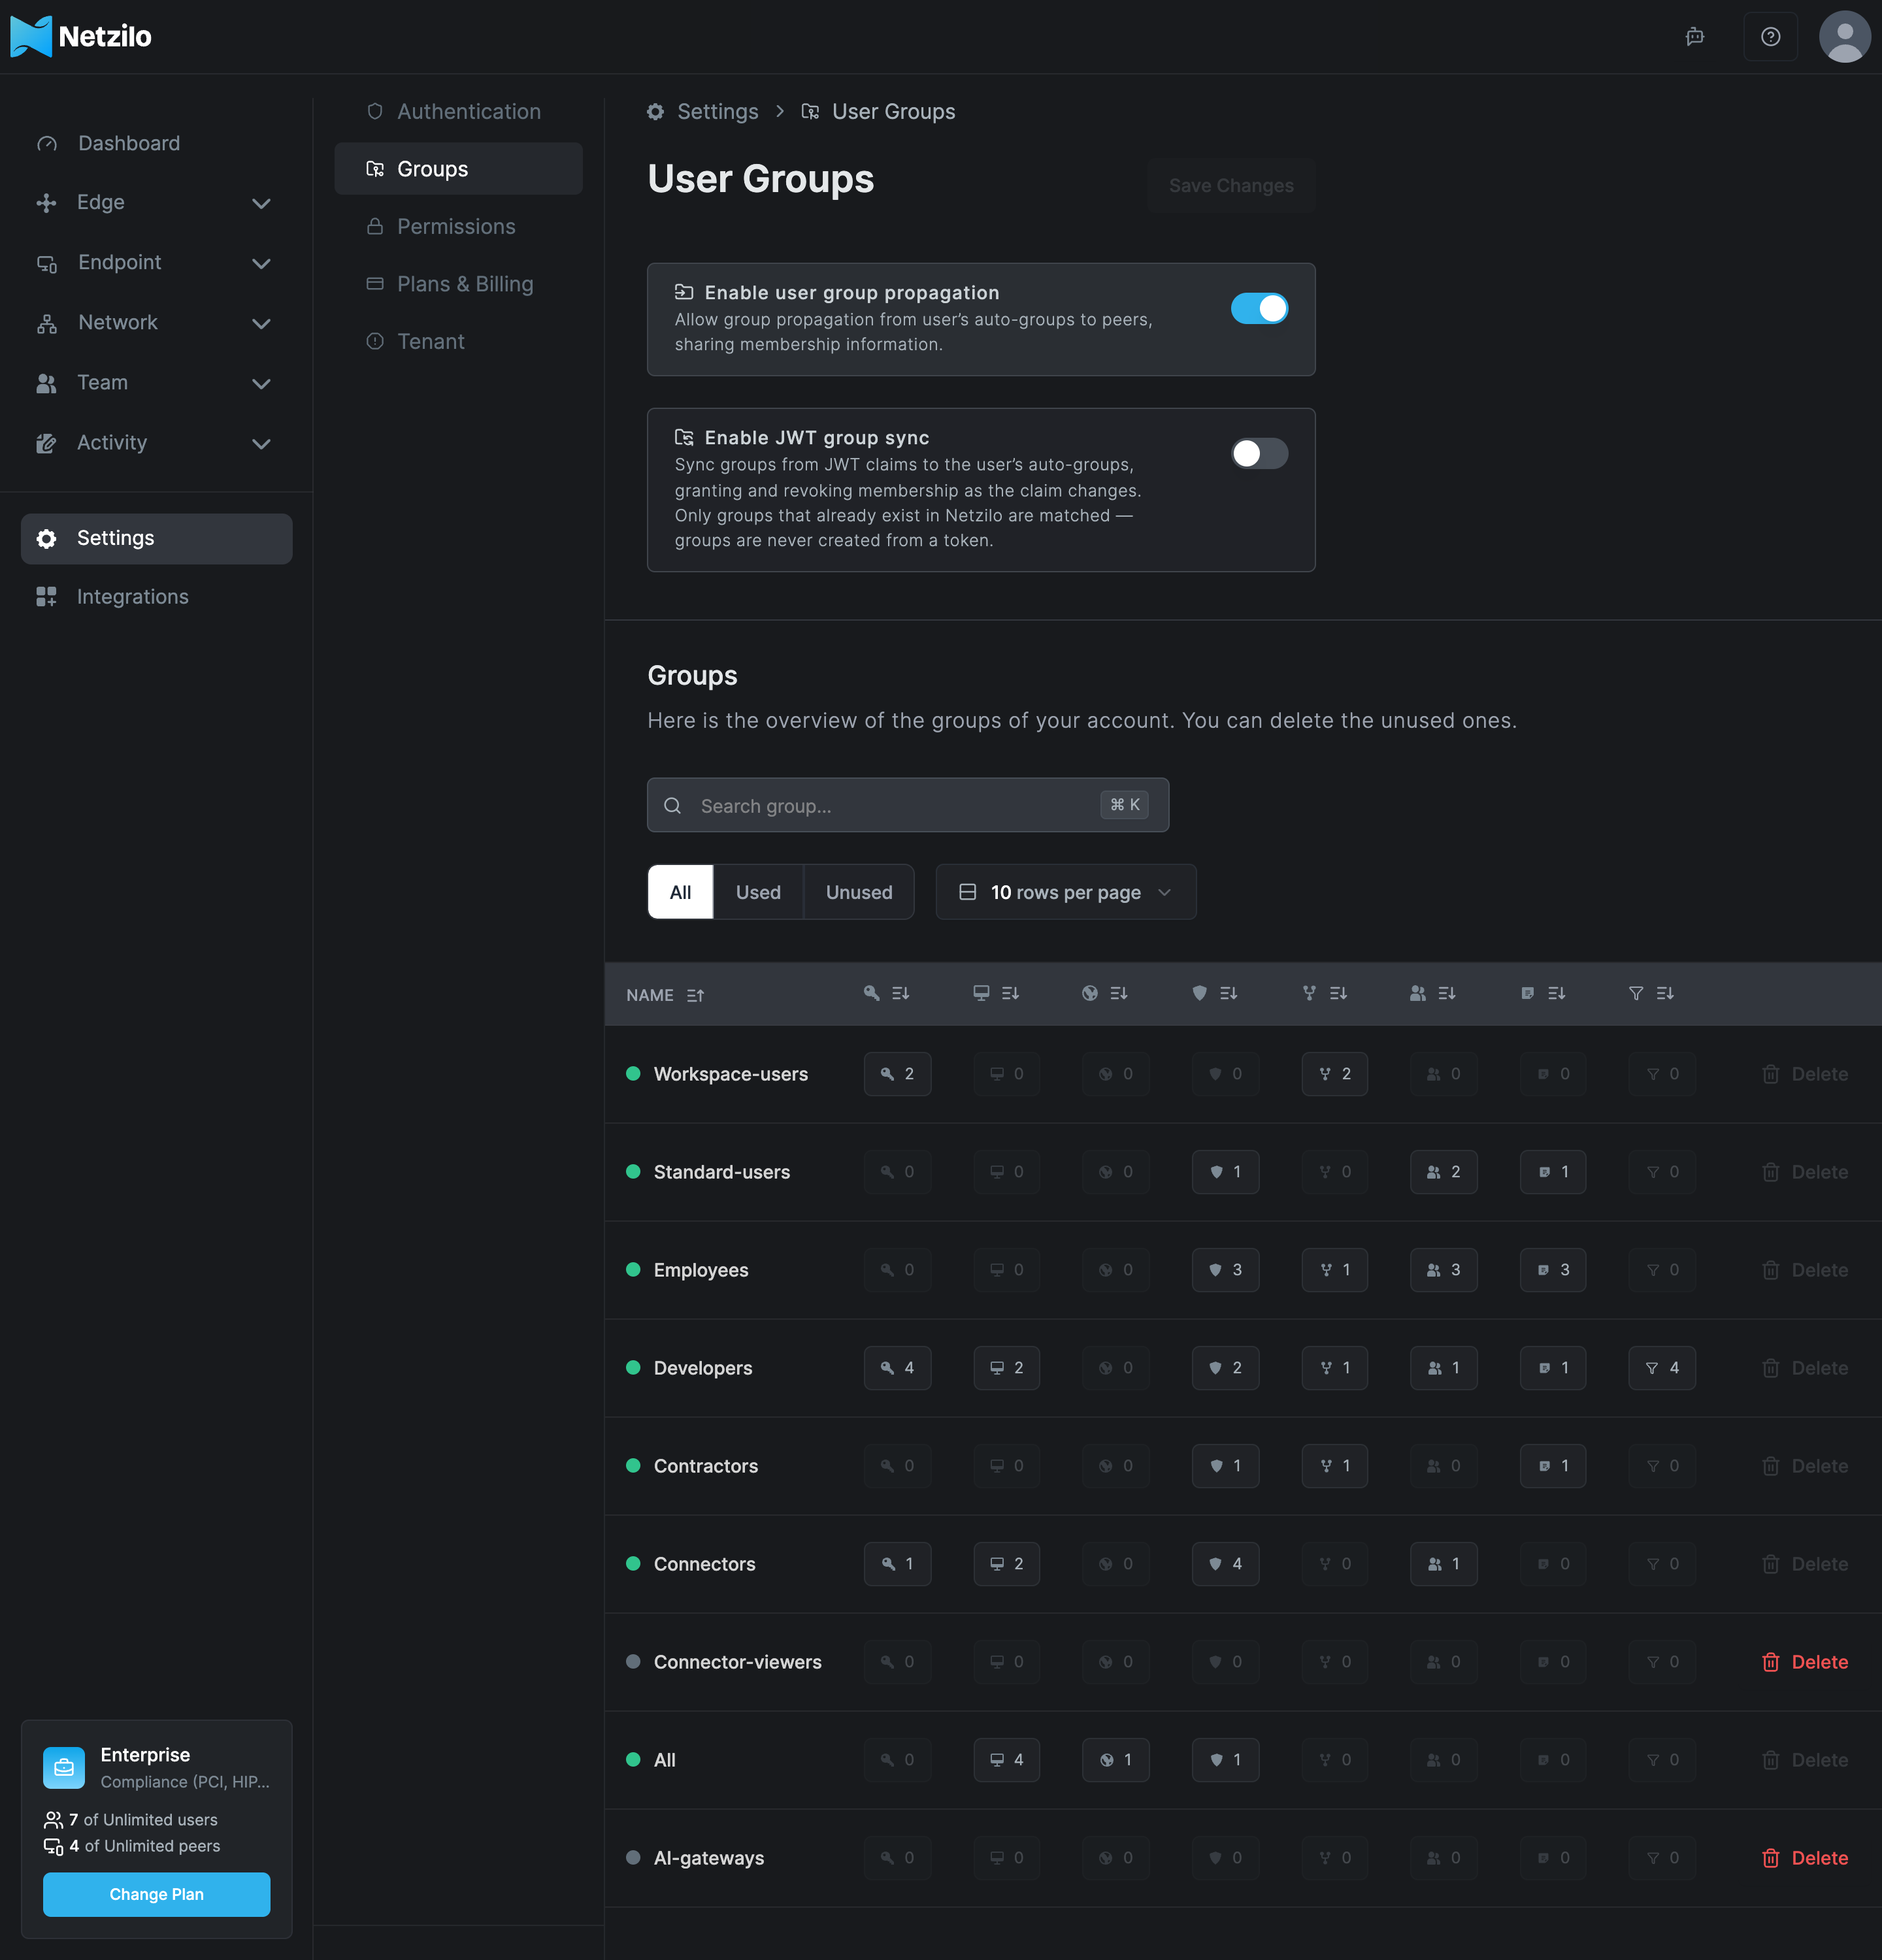
- Use All, Used and Unused to filter the list, and Search group... to find one by name.
- A green dot means the group is in use. Delete works only on unused groups. On a group in use, the tooltip says Remove dependencies to this group to delete it.
- The
Allgroup contains every peer and cannot be deleted.
To delete a group, click Delete on its row and confirm. This cannot be undone.
Naming groups
Name groups after what they mean, and keep the names stable, because JWT group sync and scripts match them by name:
- People and roles:
developers,finance,contractors - Resources:
dc-routers,prod-db - Platforms:
windows-laptops - AI use:
ai-users,agents
Troubleshooting
JWT groups are not syncing. Check that JWT claim is filled in and names the claim your identity provider really sends. Check that the groups exist in Netzilo with exactly the names in the token. Membership changes at the user's next sign-in.
Everyone is locked out after setting a JWT allow group. The administrators are not in
that group in the identity provider. Add them there. If nobody can sign in to the
dashboard, clear the allow group through the API with an Agent token:
PUT /api/accounts/<account-id> with jwt_allow_groups removed from settings. Read the
account first with GET /api/accounts, because PUT replaces the whole settings object.
A user's devices do not get the user's groups. Turn on Enable user group propagation. When you change a user's groups in Team > Users, answer yes when the dashboard asks whether to apply the change to the user's peers.
Delete is greyed out. Something still uses the group. The counts show what; remove the group there first. Groups used by disabled DNS management also count.
Related Documentation
- Authentication - Peer login and inactivity expiration
- Permissions - Who may use the portal, the AI Assistant and published applications
- Users - Auto-assigned groups per user
- Policies - Allow traffic between groups
- Identity provider and SSO - Group claims from your company identity provider
- Agents - API tokens for recovery and automation